Thursday, April 22, 2021

Butter!


                                                    "Fat gives things flavor." - Julia Child

    Butter is an amazing substance.  In addition to cheese, it's about one of the nicest things one can do to preserve an abundance of milk.  I know people who try not to eat butter, or think they shouldn't eat butter, but I know very few people who don't love butter.  Even if they're not actually eating butter, they're eating something that tastes as much like butter as possible.  We humans just love butter.  Whether churned from goat's milk, sheep's milk, yak or cow's milk, butter has been with us for thousands of years.  The National Museum of Ireland has in its collection a keg of butter which dates from 360 - 200 BCE which was found in a bog! 

    Some years ago I bought a butter churn.   I'll bet the image that comes to your mind immediately looks something like this.  Yes, this style of butter churn was around for hundreds of years, but it uses at least a gallon or so of cream at a time, and it makes a lot of butter.  Pounds and pounds of the stuff.  Later churns were an improvement on the older type, but they also made far more butter than a small family could use.


    Around the turn of the Twentieth Century, however, someone figured out that making butter could be done on a much smaller, family sized scale, and the butter churn was redesigned based on a glass container with paddles inside which were turned by a hand crank.  T
his kind of churn required far less cream, made a lot less mess,  and was much faster and easier to work with  than plunging away, up and down, with a dasher (the stick thing you see in the middle of the churn above).  It was also much easier to clean and store. Most of these glass, hand-cranked churns are called Dazey churns. 

     I bought one of these Dazey churns about 10 years ago.  It probably dates from about 1930, and I'd used it a few times for demonstrations, but it had languished on a shelf for a number of years.  You see, living in Wisconsin, The Dairy State, I have evidently been under the misapprehension that it was possible to get fresh, raw cream from a local dairy rather than buying pasteurized cream at a local supermarket.  Alas, this is far more difficult than one might expect.  There are laws in place that prohibit sales of raw milk in the state, and woe betide the farmer who attempts it.  Even though there is a provision in the law that permits "incidental sales" at the farm, I have yet to find a single dairy farmer who is willing to risk it.  It's almost a superstition, and the mere mention of it will have a farmer edging away from you nervously.  Thinking it was the raw milk angle that was the problem, I thought I would inquire about pasteurized cream instead.  Nope.  I can't seem to get pasteurized cream from a local farm, either.  There is one cheesemaker who sells cream, but only to select customers who were "grandfathered in".  Alas, I am not among the favored "grandparents".

    I kept waiting and hoping to find that one, magical source of direct-from-the-farm cream, but I finally gave it up and decided that butter making would have to proceed without farm-to-table cream.   I bought a couple of pints of heavy whipping cream at our local market, got the churn down from the top of the tea hutch, washed it up carefully inside and out, and remembered the pleasure of making homemade butter.  It has now become a regular part of what I do.

    Here's how to do it:

    First, make sure all your butter making items are scrupulously clean.  Butter will go rancid quickly if the items used to make it are at all dirty.  Scalding water can be used on any wood items.   One butter maker recommends a solution of 50/50 white vinegar and water followed by a thorough rinse in hot water, and that seems to work well.    I've also used salt in addition to scalding water on the wood items.  Don't use bleach under any circumstances, and no antique churn or wooden molds or paddles should ever go into the dishwasher.  Avoid detergents with strong perfumes as the smell will leach into the butter.  I like to air dry my butter making items in my dish drying rack. I use a clean towel to start the drying process and let them finish up on the rack.

                              The Dazey churn, paddles, butter molds, and cream are ready to go.
  
    You need to buy heavy whipping cream to make butter.  It has the highest fat content, and that's what butter is: fat.  The temperature of the cream needs to be about 65 degrees, so you will need to take it out of the refrigerator and let it sit out to warm up a bit before you churn it.  It will take about 20 minutes  or so to churn the butter when your cream is at the proper temperature, and it will take forever if it's too cold.  When I have read period novels or stories of early farm life, I used to wonder why women would set their churns near the fire in winter.  I thought it was just a bit of romance thrown in by the writer, but one session with churning cream that was too cold made it obvious.  

    Fill your churn no more than two-thirds full of cream.  The first stage of butter churning will create whipped cream which takes up a lot of room,  so you don't want to overfill your churn.  Screw the lid on firmly, and start cranking away.  Sing a little song if you want.


    I had thought that there would be loads of butter making songs - something to do to pass the time while plunging that dasher up and down in the churn - or, in this case, cranking away at the handle - but I couldn't find as many as I had thought there would be.

    There is one churning song from eastern Kentucky sung to the tune of The Farmer in the Dell:
     Churn churn, churn, this is churning day,
     'Til the golden butter comes, the dasher must not stay.
     Pat pat, pat, make it smooth and round,
    Now the golden butter’s done, won’t you buy a pound?

    
    The churning song I know goes like this:
        Come butter come.  Come butter come.
        Peter's standing at the gate waiting for a butter cake.
        Come butter come.

    I never knew the tune, though.  I recently found a recording of this song sung by a 74 year old grandmother while churning butter.   https://www.youtube.com/watch?v=nHTrxmyJHBY.  The slosh of the churn as she sings is wonderful. 

    And if you enjoy Irish fingerpicking guitar, there is a wonderful jig called "Hag at the Churn" played by Jean Banwarth that you can listen to https://www.youtube.com/watch?v=yai6wjmTZOI  while you are churning away.

    The first thing that is going to happen in your churn is whipped cream.  Yum.  But to get butter, you're going to have to keep cranking.  Get your spouse or the kids to go at it awhile; you'll get there. When it starts to get stiff and harder to crank, butter is on it's way.  Pretty soon, you'll start to hear sloshing: this is when the butter solids start to separate from the liquid.  You'll start to see the some of the buttermilk splashing against the inside of the churn.   If you take the lid off and look at the butter at this point, it will look like little grains.  Put the lid back on and keep at it.   When the buttermilk runs down the side of the jar, and when you can see that there is a lump of butter around the paddles and the buttermilk flows easily around it if you tip the churn, then it's ready.  

    Now comes the fun and messy part.  Get your butter paddles (those flat wooden things that look like, well, paddles) ready and have your salt ready in a little dish (about 1/8 tsp. per pound of butter) that you can get to with buttery hands.  The salt helps to preserve the butter, and it doesn't take much, but you can leave it out if  you prefer.  I find that it enhances the flavor and is not nearly as salty as commercial butter.  You'll want a surface of some kind to work the butter on.  I have a large, marble cutting board that keeps the butter nice and cold.   

    Pour the contents of the churn into a strainer that is suspended over a bowl.  The liquid in the bowl is buttermilk, and you can use it for all kinds of things.  It's different from the cultured buttermilk that you buy at the store, but it's just as useful.  Don't throw it out.
    
    Take the strainer to the sink and rinse the butter in ice cold water, mashing it up a bit as you do so to start releasing the excess buttermilk. I've found it works well for me to drop the butter in the strainer into a large basin of cold water, work the butter around, then dump it back into the strainer  and refill the basin with fresh, cold water so I can do it again.   It takes about three washings before the water runs clear.  

    Now take your butter lump and put it onto your work surface.  Bash the butter about rather like kneading bread to get the last of the buttermilk out, squeezing it and pressing it with the paddles.  Sprinkle the salt on, and knead it in with the paddles to incorporate it into the butter and press out the last of the buttermilk.  Give it a good whack or two, flip it over, and do it again.  There's a satisfying smack as the butter paddles work away.  


The curved paddles in this photo are Norwegian.  The flat ones in the photo above are English.  


    Shape your butter into the usual rectangular shape using the paddles, or you can press it into a butter mold that has been soaked in cold water.  Chill your butter, then drop it out onto a plate.  Your family will gasp at your artistry and will attack the butter with gusto and hunks of warm bread.


    If you're interested in making butter but you don't have a churn, you can experiment with shaking it up in a large canning jar and using a couple of spatulas or wooden spoons to work your butter.  You can shape it into little balls with a melon baller or shape it into any form you like, chill it a little,  and use a cookie press to press a design into the butter.  You can add herbs like chives or basil or even lavender.  Plain or fancy, home churned butter is in a league of its own.  

   If you decide to go all the way and get a churn, you can find them in antique stores.  I've tried one of the newer churns, and the gears just don't hold up, so go for the antique/vintage churns.  Check for cracks and chips, and make sure the lid comes off and the handle turns.  You'll need to give it a good scrubbing and oil the gears with vegetable oil.  You can find wooden butter paddles and butter molds online through Lehman's, a store that sells to the Amish community as well as low-tech folk and homesteaders.  
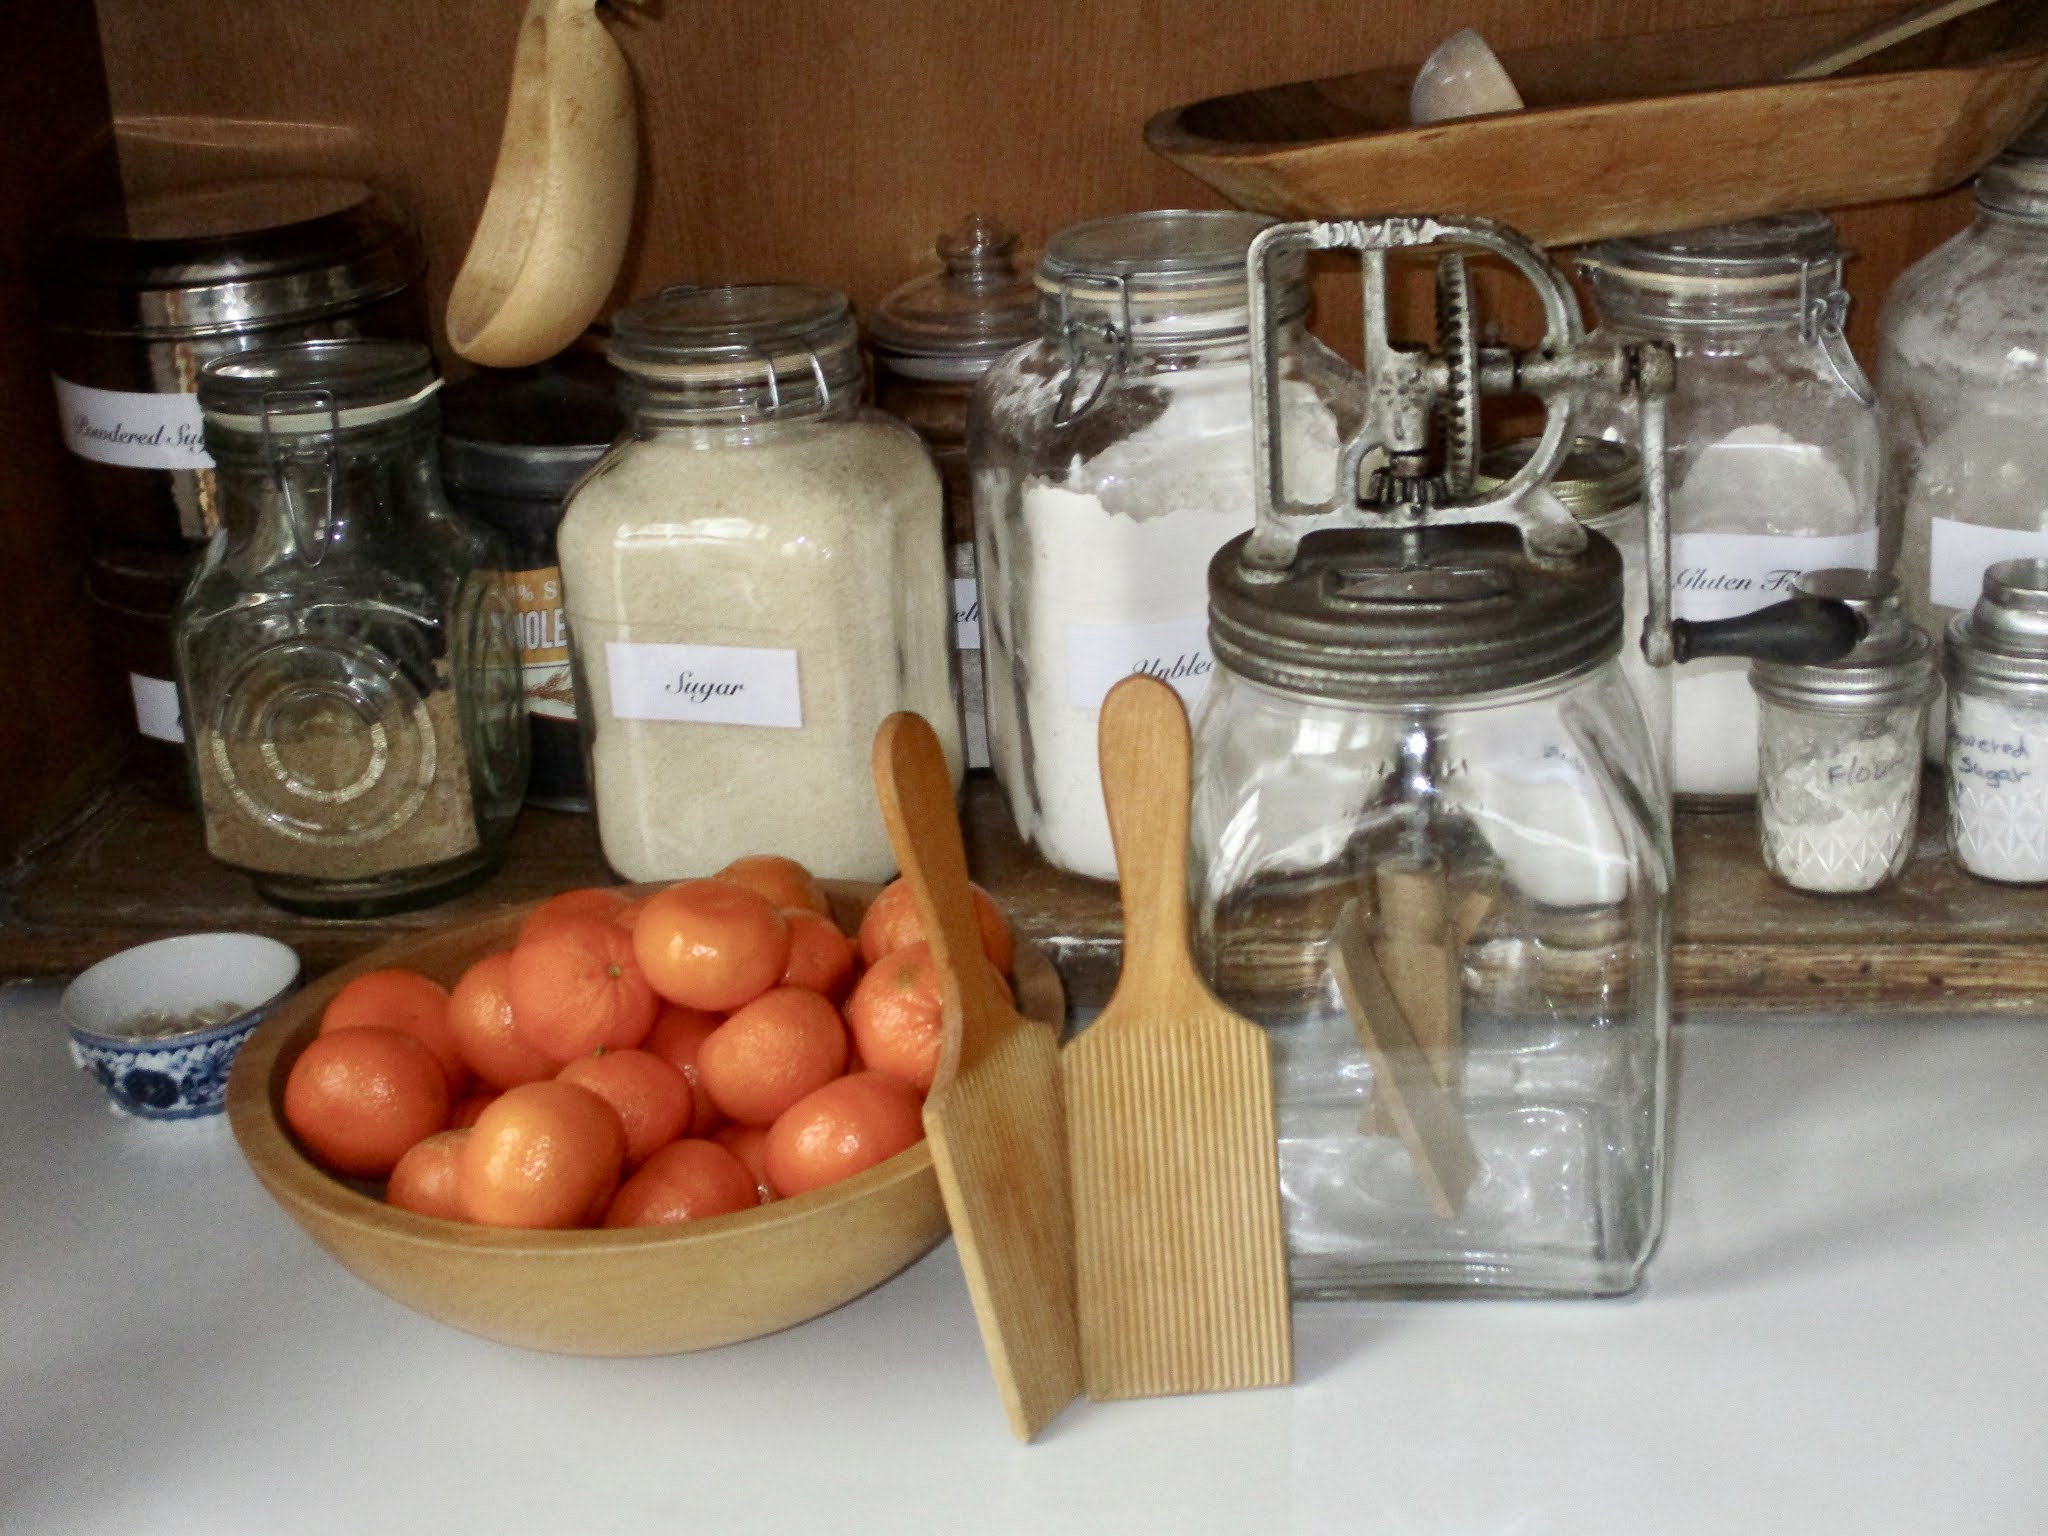
The new, larger churn is the household favorite now.

    Churning your own butter is a delicious way to experience a part of Victorian living that would have been commonplace in many rural households.   And now, if you'll excuse me, I feel a sudden urge to go toast some bread and smear fresh butter on it.  Mmmmmmm...


Wednesday, March 31, 2021


A Tale of Six Hats


    This is likely to be a shorter post than most, but I think it is important since it has taken up a good deal of my time since I recovered from my broken wrist in January (see "A Witch, a Spectre, a Skull, and a Snap" for that story), and it incorporates one of the most popular Victorian activities for ladies - knitting.

    In preparation for writing this post, I looked for customs regarding gift-giving in the Victorian era.  Sadly, most of the information I could find dealt with presents exchanged at the holidays.  I did, however, stumble upon a delightful book of etiquette which contained instructions regarding the giving of presents:

OR THE MANNERS, CONDUCT AND DRESS OF THE MOST REFINED SOCIETY;

INCLUDING

Forms for Letters, Invitations, Etc., Etc. Also, Valuable Suggestions on Home Culture and Training.

COMPILED FROM THE LATEST RELIABLE AUTHORITIES, BY JOHN H. YOUNG, A.M.

    The first entry I found on the subject of making presents ran as follows:

"GUESTS MAKING PRESENTS.

If a guest wishes to make a present to any member of the family she is visiting, it should be to the hostess, or if to any of the children, to the youngest in preference, though it is usually better to give it to the mother. Upon returning home, when the guest writes to the hostess, she expresses her thanks for the hospitality, and requests to be remembered to the family."


That was not precisely what I had in mind, but then I found this gem:

"RECEIVING AND MAKING PRESENTS.

Emerson says: 'Our tokens of love are for the most part barbarous, cold and lifeless, because they do not represent our life. The only gift is a portion of thyself. Therefore let the farmer give his corn; the miner his gem; the sailor coral or shells; the painter his picture, and the poet his poem.' To persons of refined nature, whatever the friend creates takes added value as part of themselves—part of their lives, as it were, having gone into it. People of the highest rank, abroad, will often accept, with gratitude, a bit of embroidery done by a friend, a poem inscribed to them by an author; a painting executed by some artist; who would not care for the most expensive bauble that was offered them. Mere costliness does not constitute the soul of a present; it is the kind feeling that it manifests which gives it its value. People who possess noble natures do not make gifts where they feel neither affection nor respect, but their gifts are bestowed out of the fullness of kind hearts."


        This was the perfect sentiment.  Which brings me to the story of the six hats. 

    I have not written about COVID in any of my posts, since it has dominated the news in every corner of the world for a year now, but to tell this story, this devastating virus must, alas, be mentioned.  

    A dear friend of ours returned to the Madison area last year after a number of years living away from the area.  We met for dinner in late summer - outside and carefully distanced - to renew our friendship.  She mentioned in passing that she had suffered from COVID twice.  This was serious business, since our friend has multiple health issues which put her at significant risk; however, as winter approached and we all went back into isolation, we believed that she couldn't possibly fall ill again.  We were wrong.  

    Our friend developed respiratory symptoms in mid-November which steadily worsened.  On the Wednesday evening before Thanksgiving, we called to check on her, and it was clear that her condition was very serious indeed.  We instructed her to call an ambulance, which she did, and she was taken to UW Hospital that very night.  

    Like families and friends everywhere whose loved ones are hospitalized with the virus, we were unable to visit her, and we could only keep in contact with her through her cell phone or Facebook Messenger and pray for a safe recovery.  One day she didn't answer our calls or messages at all, and we feared the worst.  

    I have always had great respect for Hygeia,  the Greek goddess of health and healing, so I asked Her to intervene on behalf of our friend and promised that I would give something back in return when our friend recovered.  Eleven long days later, our friend was released from hospital.   My wrist was still in a cast at that point, but I knew what I wanted to do to express my thanks to Hygeia and my gratitude to the medical team that had saved our friend's life.  I needed to make something, rather than buy something, to give to the medical team, so as soon as I could manage it, I started knitting hats.  

    I knew I couldn't possibly knit hats for everyone on the COVID team who had cared for my friend - there were more than she could count - but I hoped that six of them would suffice.  I usually spin yarn rather than knitting it, and I am not a fast knitter, but I was determined not to return to my spinning wheel until I had finished knitting the hats.  I set to work with my needles in mid-January, and the hats were completed and delivered to the hospital this past Friday with a note of thanks. 

    Apparently, the COVID team at UW Hospital is well-supplied with candy from the hospital gift shop as a thank-you gift from family members and friends of other patients, so I hope the hats I've knit for them are a welcome change.  Each hat was knit with a different pattern.  Funky, folksy hats are a "thing" here, and I hope the team members who "adopt" them will enjoy them.   The wool yarn from which they were knit comes from the Blackberry Ridge Woolen Mill in Mount Horeb, Wisconsin, just a bit down the road, so I was able to support a local business in my gift making.  And my knitting skills have certainly improved, though I must say that I'm delighted to be back to spinning yarn again after such a long break.

    There are still a few cold days remaining in the season for the hats to be worn, and they'll certainly come in handy this fall.  I hope the UW COVID team members who wear them will know how much they are appreciated for their tireless work, and may these hats make their days a little brighter.  

    May Hygeia bless all of them.


Thursday, March 11, 2021

 Matchless - Lighting Fires in the Victorian Era


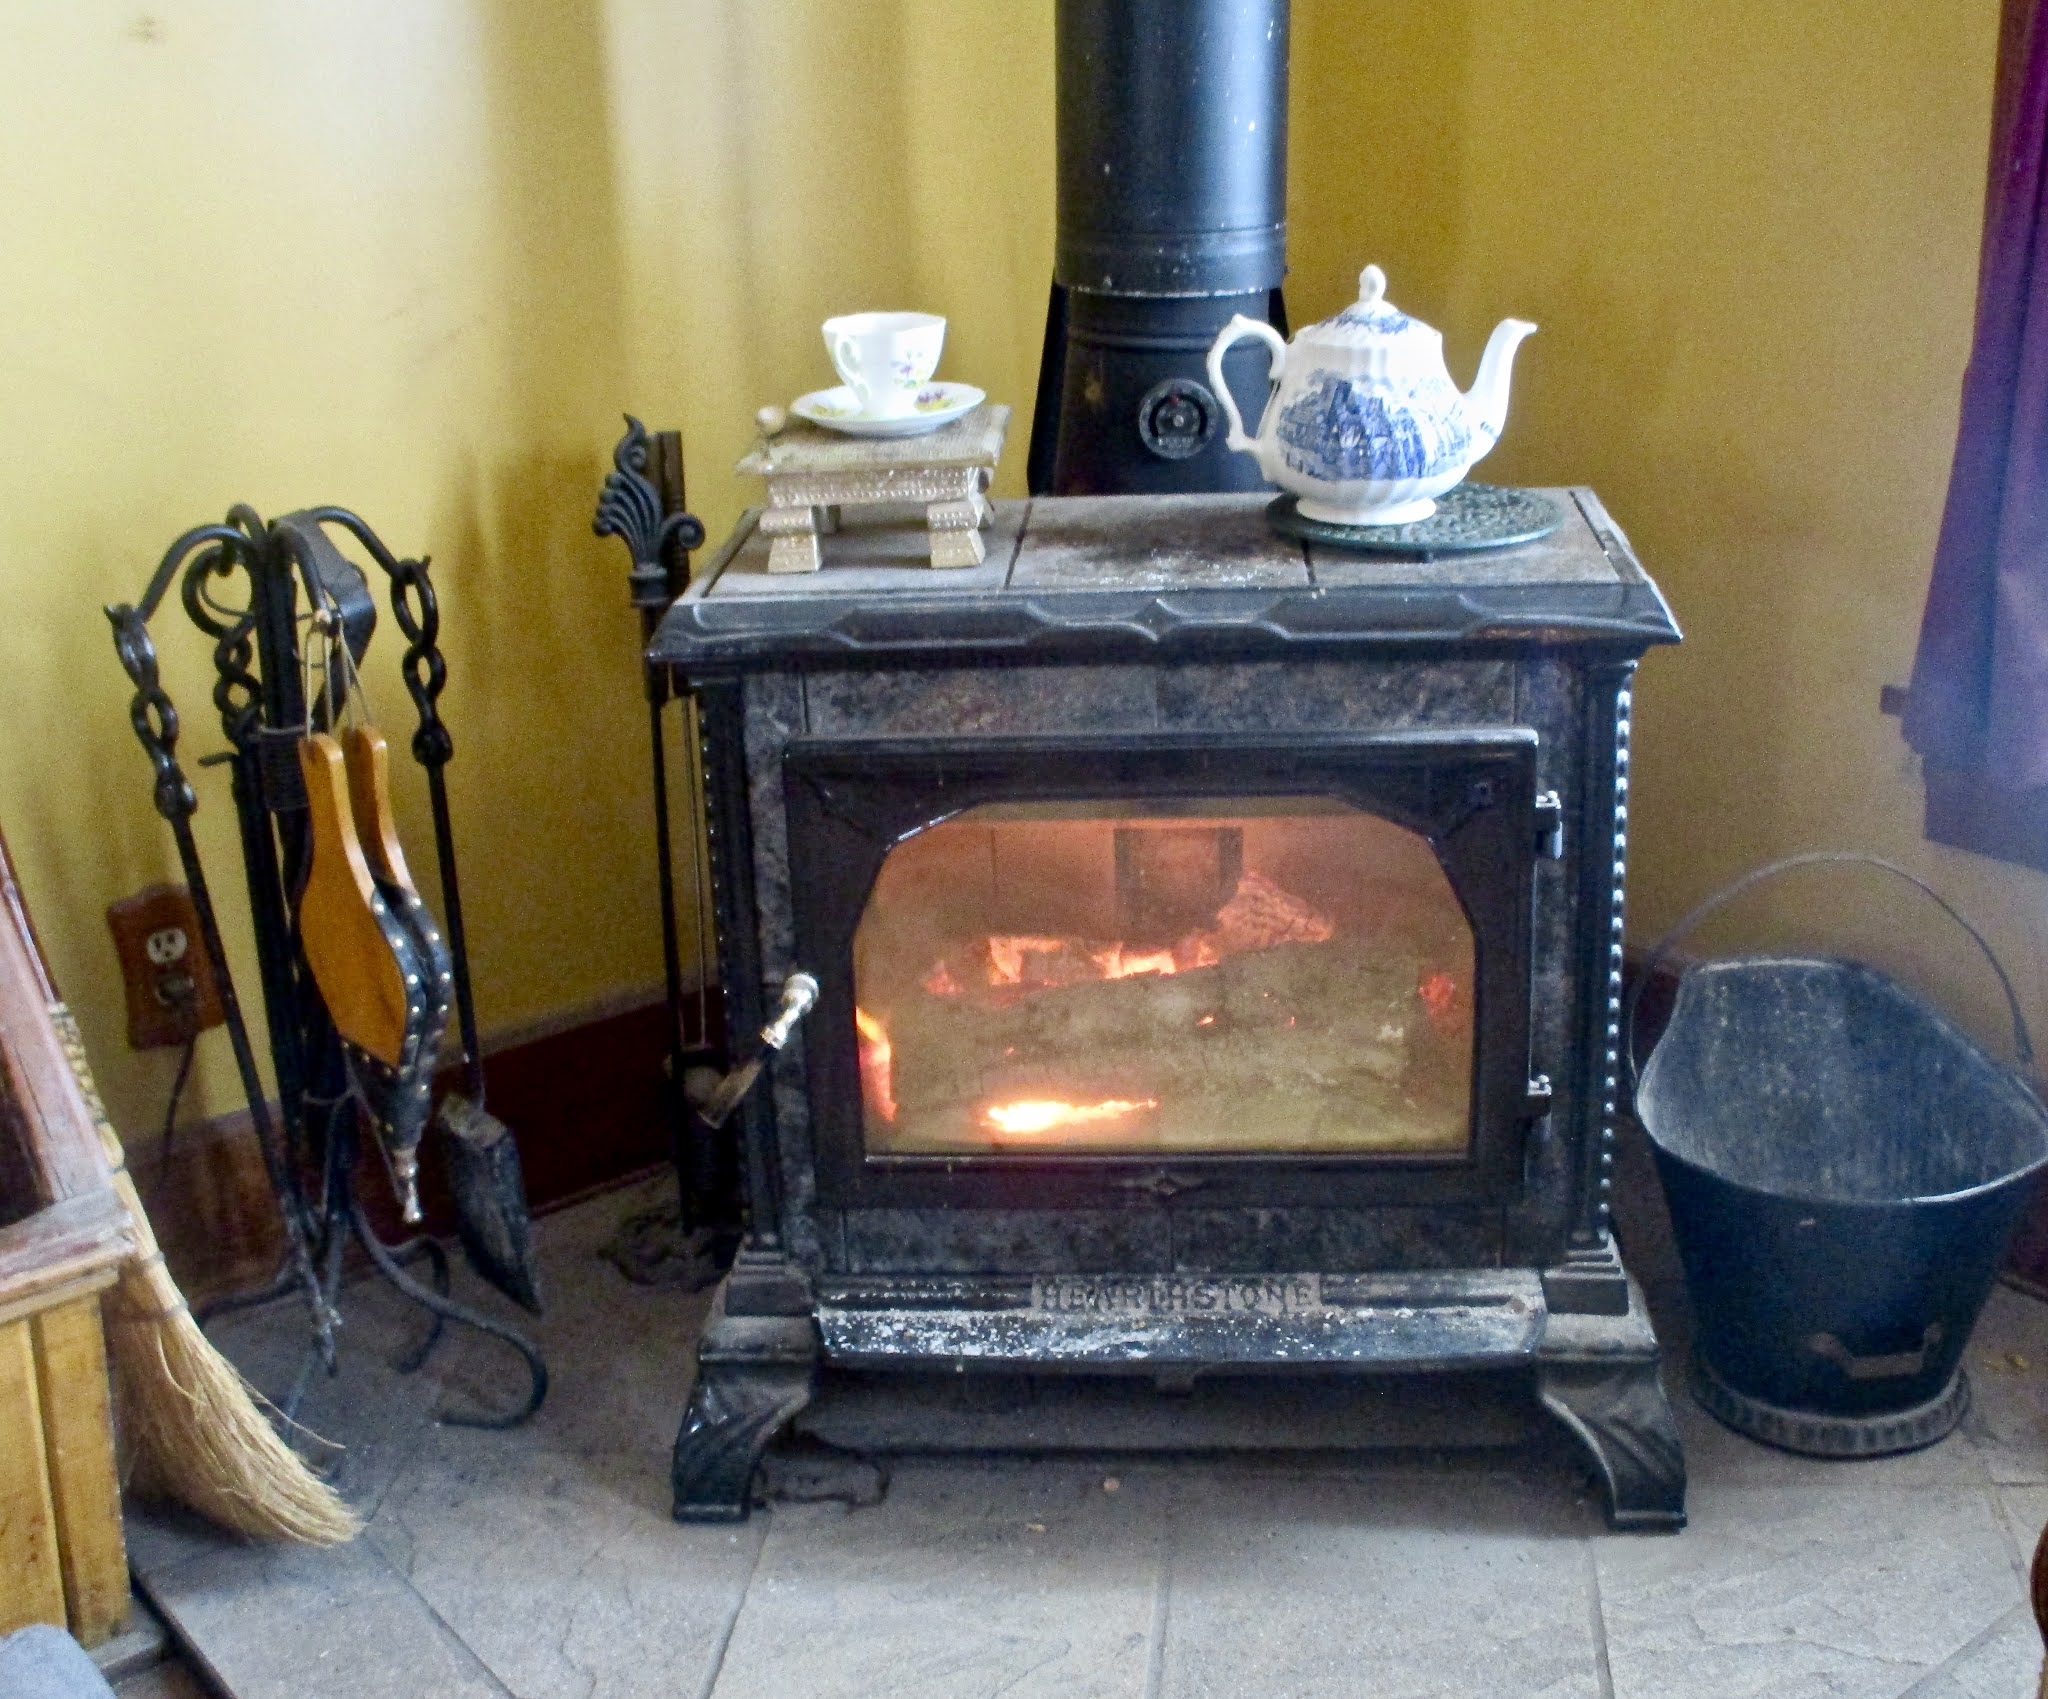
    We have two wood-fired stoves in the house - the larger wood stove in the front parlor, which contributes to heating the house, and Milly, the wood cook stove in the back kitchen.  We also have a substantial number of oil lamps and candles, and all of these have to be lit in one way or another.  You would think it would be just a matter of grabbing a barbecue lighter and flicking away, but that wouldn't be very Victorian, and I can't seem to get the darn things to work most of the time anyway.  They seem to require three hands, and the resulting flame is similar to a blowtorch, which I find is a bit much.  So we are left with two options: flint and steel and matches.  


And all matches are not created equal, as you will soon see. 

    Learning how to use a flint and steel is great fun.  This technique for fire starting has been around since at least Roman times and very likely far earlier than that.  I learned the basic technique at one of the historical re-enactment events nearby that attracts all kinds of folks who are interested in history, mostly the Revolutionary War period, and who bring skills from the period with them to the event.  We spent an evening by a fire with two very patient voyageurs, bashing away at our flints with our steel strikers and flinging bits of flint perilously near our eyes, but the pleasure of seeing those little sparks fly into the night more than made up for the danger we were so obviously in.  After our first foray,  it was just a matter of practice and learning to keep the operation a bit farther away from the face.  There's a certain cache about this early method of fire starting that using matches doesn't quite equal and which a lighter is utterly without.  Flint and steel is truly a step back in time.


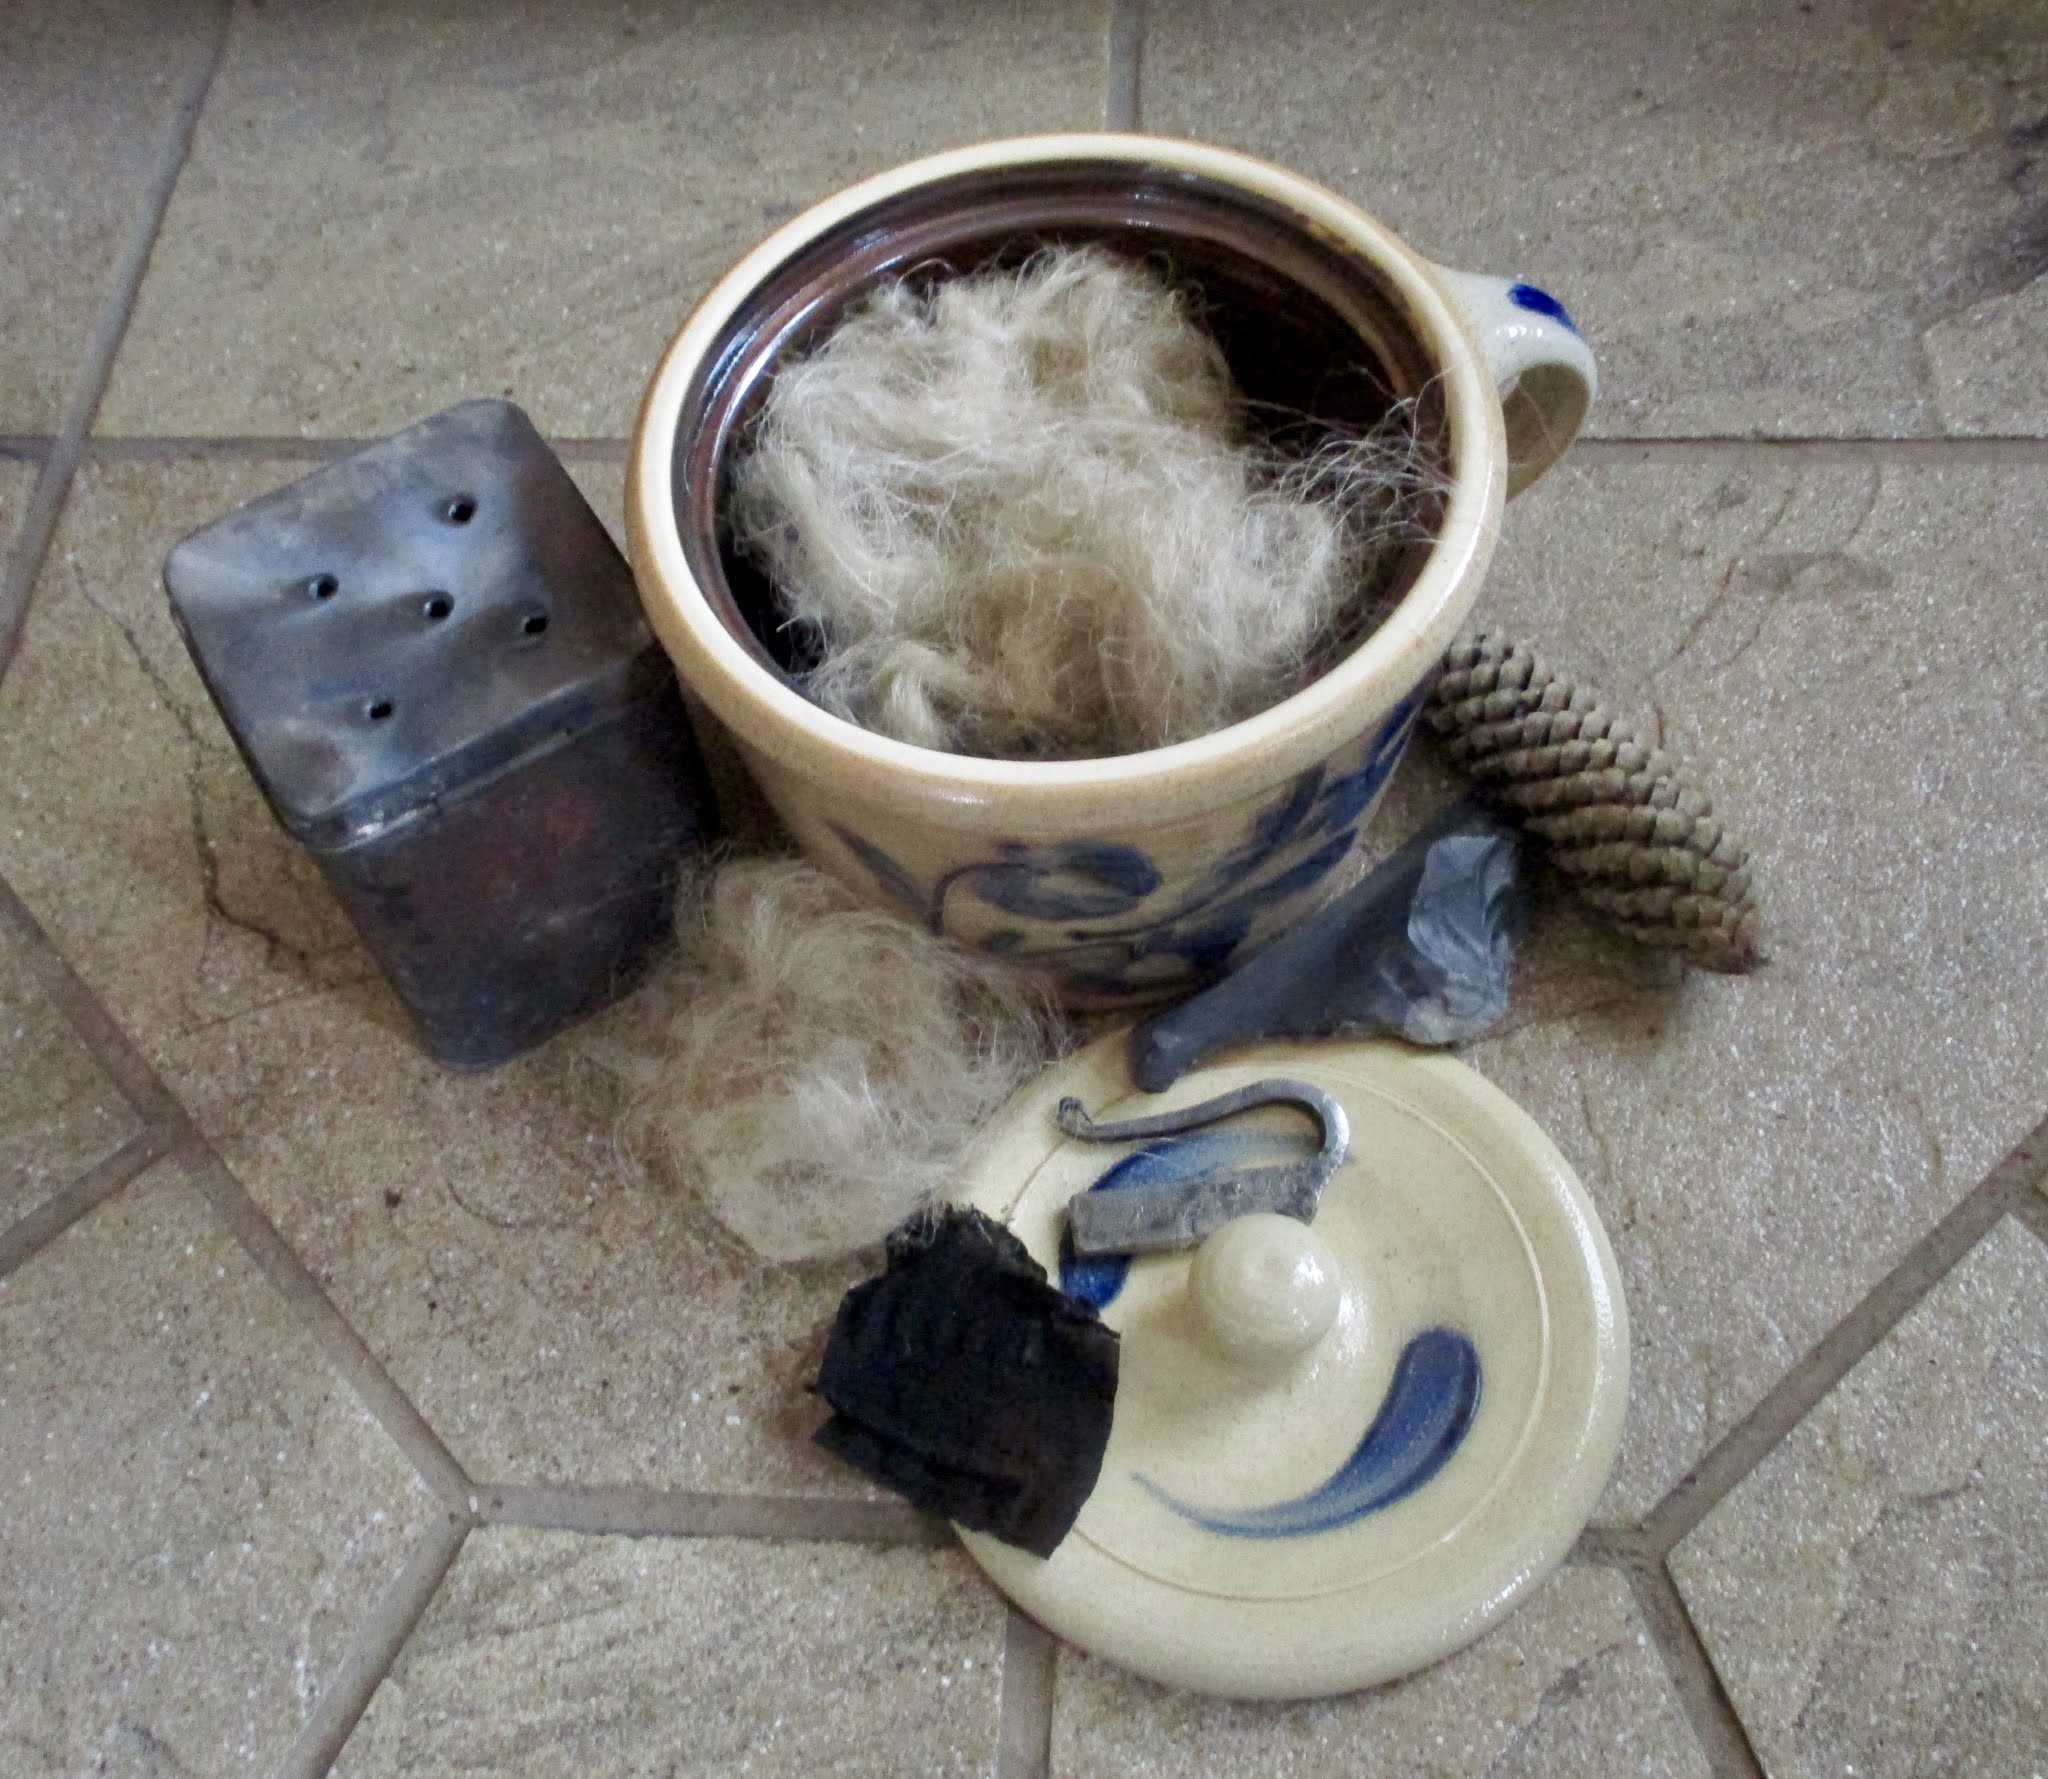
Here's  a basic flint and and steel set up.  On the left you will see three flints.  You only need one that fits your hand well.  I like English flints.  The wooly looking bird's nest at the top is flax tow - the leftover fiber from processing flax.  The black square is a piece of char cloth which is cotton that has been carbonized by cutting it into small squares, putting them into a tea tin with holes punched in the top, and setting the whole thing in a fire until the flames stop coming out of the holes in the top (you can see the tin in the photo below).  What is left when you open the tin are flimsy squares of blackened cotton called char cloth, and the tin is their storage container.  On the right side of the photo are two steel strikers in two different patterns.  You only need one of these.  


    At home, it all fits nicely into a salt-glazed crock with a lid.  I have two of these crocks - one by the parlor stove and one by Milly, the wood cookstove, with their respective char cloth tins.  You can use any kind of container you like, really, and you can use any tinder that easily catches fire, such as dry grass or straw.  There are all kinds of artisans who make the steel fire strikers, and you can purchase one of these, a good English flint, and flax tow online.  An 8 oz. bag of flax tow will last you for ages.


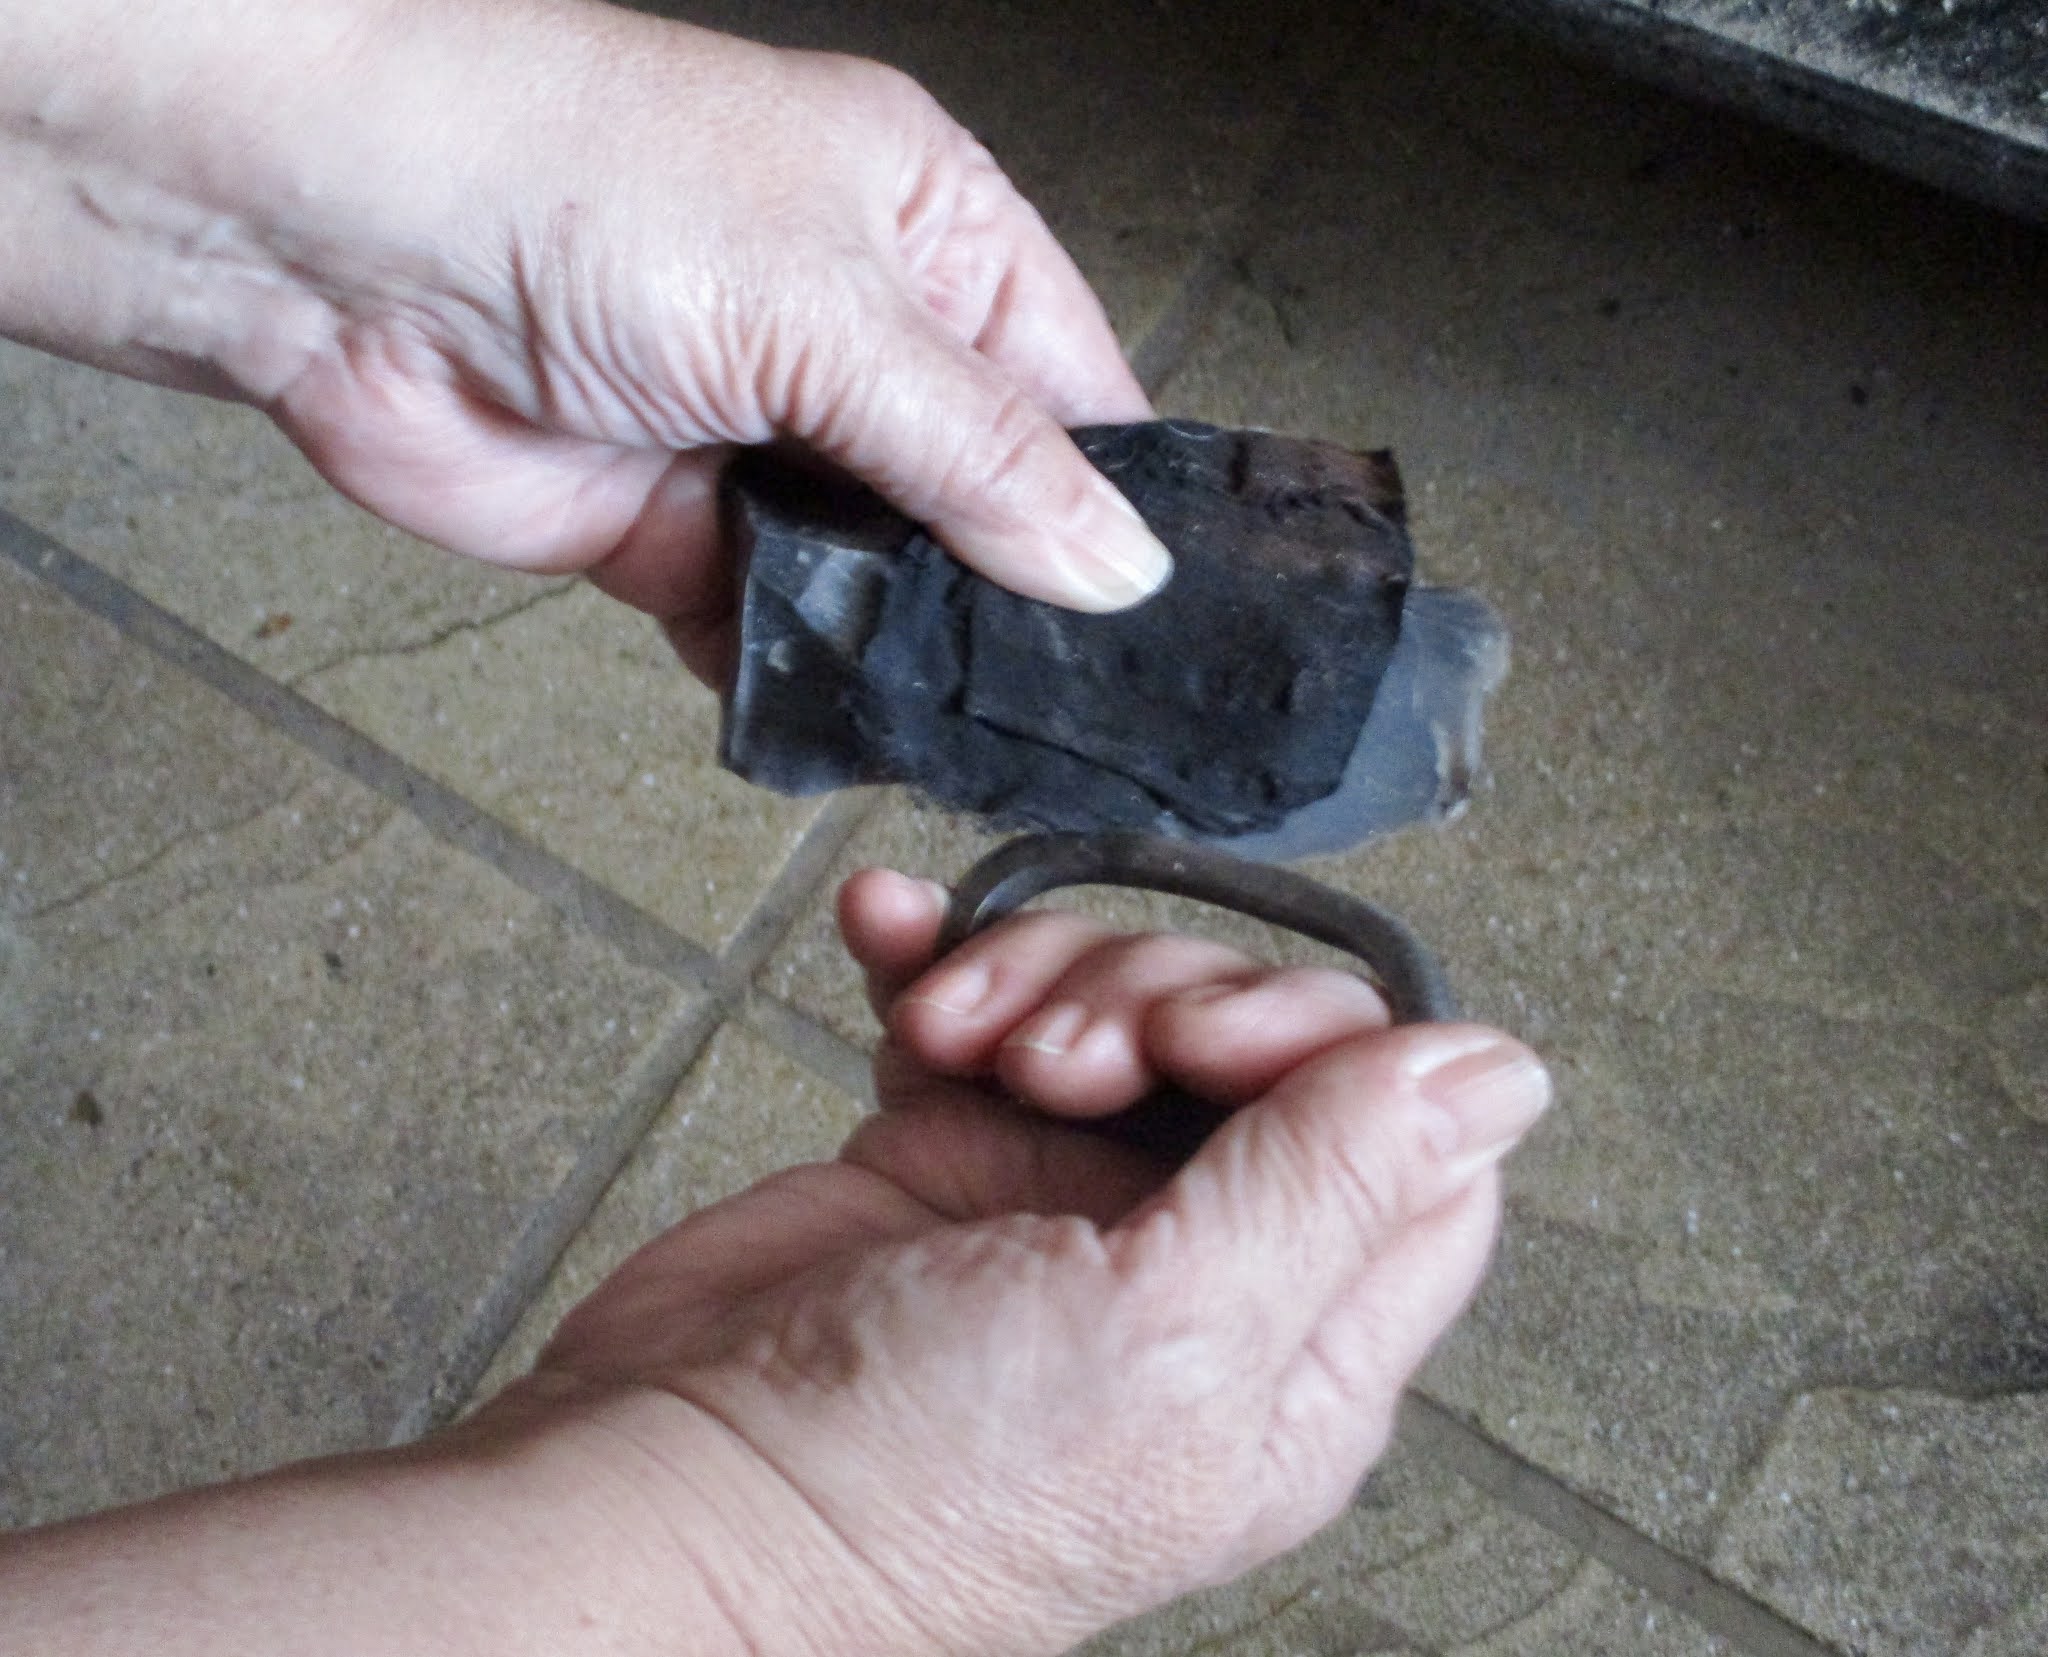
    Here's how it all works.   Build your fire using some nice, dry kindling at the bottom.  Make a little bird's nest of your flax tow and set it to one side where you can reach it quickly.  Take a piece of char cloth out of its container.  Holding the flint in one hand, cover it with the piece of char cloth, leaving just a bit of the edge of the flint exposed.  Tip the flint with the char cloth downwards so that it is at a slight angle, with the striking edge of the flint lower than the part in your hand.   Sparks tend to fly upwards, and holding your flint at a slight angle gives you a better chance that a spark will land on your char cloth.  Whack the edge of the striker against the edge of the flint with a swift, downward stroke.  When done correctly, this will cause a spark to fly up.  After a few strikes (or a few more strikes), a spark should land somewhere on your cloth (it's really impressive when you can do this on the first strike).  Take your cloth with the little spark on it, and place it in the bird's nest of tow, making sure the spark is in contact with the tow.  Blow on the spark in the bird's nest.  You'll see the tow start to smolder and then catch fire with a "whhooomp!".  Quickly put the burning tow under the kindling, and you're off!  If you're going to try your hand at this method of fire starting, just make sure that any materials that would catch fire rapidly are out of the way.  When the tow catches fire, it burns high and hot, and you have to move quickly.  I use a flint and steel about 50% of the time when starting a fire.  I just like it.  By the way, I recommend practicing with just the flint and steel first until you get the hang of striking sparks rather than knapping flint.  

    What in heaven's name, you might ask, does any of this have to do with Victorian technology?  Why not just use a match?  Remember, dear reader, that early in Victoria's reign, the American pioneers were moving westward.  Fires had to be started every night to cook food and perhaps again the following morning.  It could take months to travel across the prairie and over the Rockies to reach the western frontier.  That's a lot of matches.  On the other hand, a little dry grass, a square of char cloth, which could be made anytime the supply ran low, and a flint and steel meant that a fire could be started anywhere.  

    But let us leave the attractions of flint and steel behind us and take up the humble match.   Throughout most of the Victorian era, heat and light came in the form of candles, oil lamps, kerosene heaters, and firewood, and for most people, unless they were crossing the prairie in a covered wagon, all those called for matches.  There was no flicking of a light switch, setting a thermostat, or turning a knob on the stove.  It all depended on a match.

    The history of matches, and who did what when, is rather hard to determine.  The first modern, self-igniting match was probably invented in 1805 by Jean Chancel, assistant to Professor Louis Jacques Thénard of Paris. It was followed in 1817 by the “Ethereal Match” which consisted of a strip of paper treated with phosphorus that ignited when it came into contact with air.  The paper was sealed in a tube and quickly burst into flames when it was removed.  This invention sounds more like a method of self immolation than a means of lighting a candle.  I would have stuck to my flint and steel, thank you very much.

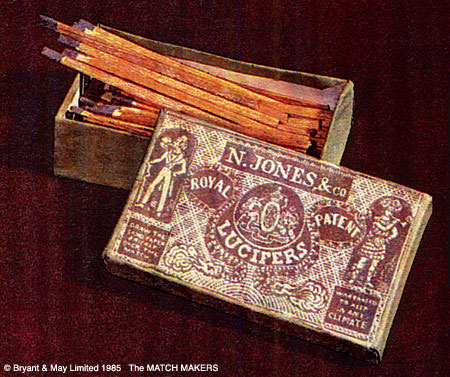
      In 1826 John Walker was in a laboratory in the back of his apothecary trying to develop a new explosive, presumably before afternoon teatime.  As he stirred the chemicals with a wooden stick, he noticed a tear-shaped drop had dried to the stick’s tip. He tried to remove the drop by scraping it across the stone floor, and the stick ignited. Hey!  Presto!  A match!  A friend of Walker's, Samuel Jones, saw a commercial goldmine and set up a match making business shortly thereafter.  He called his matchsticks "Lucifers," and Londoners loved them.  


    There was a design flaw, though, to these delightful little fire starters: t
hese early matches gave off a shower of sparks when ignited and an odor so horrible that boxes carried a warning, “If possible avoid inhaling gas; Persons whose lungs are delicate should not use Lucifers.”  Lucifer appeared to be an apt name for these matches: they smelled like the very bowels of Hell itself.

    From there, the safety match was developed.  Safety matches were designed to strike on their boxes only.  There were scads of different brands with charming names like Bee & Snail, Cactus, and The Tiger.  These sound more like pub names to me.  There was even a brand called "The Duel Just So!" which featured an illustration of a crocodile attempting to pull an elephant into a river while the poor pachyderm resists valiantly.  Gruesome but memorable.


Even Queen Victoria got her own Diamond Jubilee trademarked box of safety matches.  


Sadly, manufacturing the matches created serious health problems for the workers, mostly women, due to constant exposure to the phosphorus required to make the matches.  This led eventually to the great Match Girls Strike of 1888, after which conditions for the workers improved thanks to the efforts of Annie Besant and the Salvation Army.

    The Diamond matches which are so ubiquitous today were manufactured beginning in 1880.  The boxes you see on the shelves say "Strike Anywhere."  That's what the old Lucifers used to do, and that's precisely what red-tipped Diamond matches don't do - it's the side of the box or nothing, and the side of the box tends to degrade rapidly leaving part of a box of matches and nothing to strike them on. The Ohio Blue Tip matches I grew up with, which actually did strike anywhere, are only to be found on Ebay for $18.50 per box as a "vintage" item.  Really.

    Which brings us round to match holders and match safes with striking surfaces like these:   

    These are two very simple, utilitarian, antique match holders.  Some match holders are very elaborate and very collectible, but I err on the side of functionality and thrift.  The one on the left has two compartments: one on the left side for unused matches and another on the right side for spent ones.  

    You can also see that each of these antique match holders has a striking surface: the one on the left has a striking surface in the middle, and the one on the right has striking surfaces on both sides.  I have, however, been unable to strike a single spark anywhere on either of them when I have used one of the red-tipped Diamond matches.  The matches will break, the tip will wear off, but not a spark, and certainly no flame.  It was easier to turn on the gas stove and light my matches there, which is hardly Victorian.  I could only admire my match holders as semi-functional, largely decorative items, and there are few things that irritate me more than an antique item that doesn't work and is relegated to a dust catcher.  I was baffled.  There was no reason that the striking surfaces shouldn't work.  They had been used in the past to judge from the marks on the striking surfaces.   It had to be the matches.  Clearly, all matches were not created equal.

    Enter the new Diamond Greenlight matches to solve the problem and make my match holders work once again. I love these little fire sticks.  I can zip one along the striking surfaces of my match holders, and they fire up every time.  I don't know what's different, and I really don't care.  They work, and the green tip is a cheerful color.  I can now look for other match holders and have one in every room, ready to light a candle or oil lamp in a moment.  Though they may not know it, the Diamond Match Company has raised the spirits of Victorian match users everywhere.


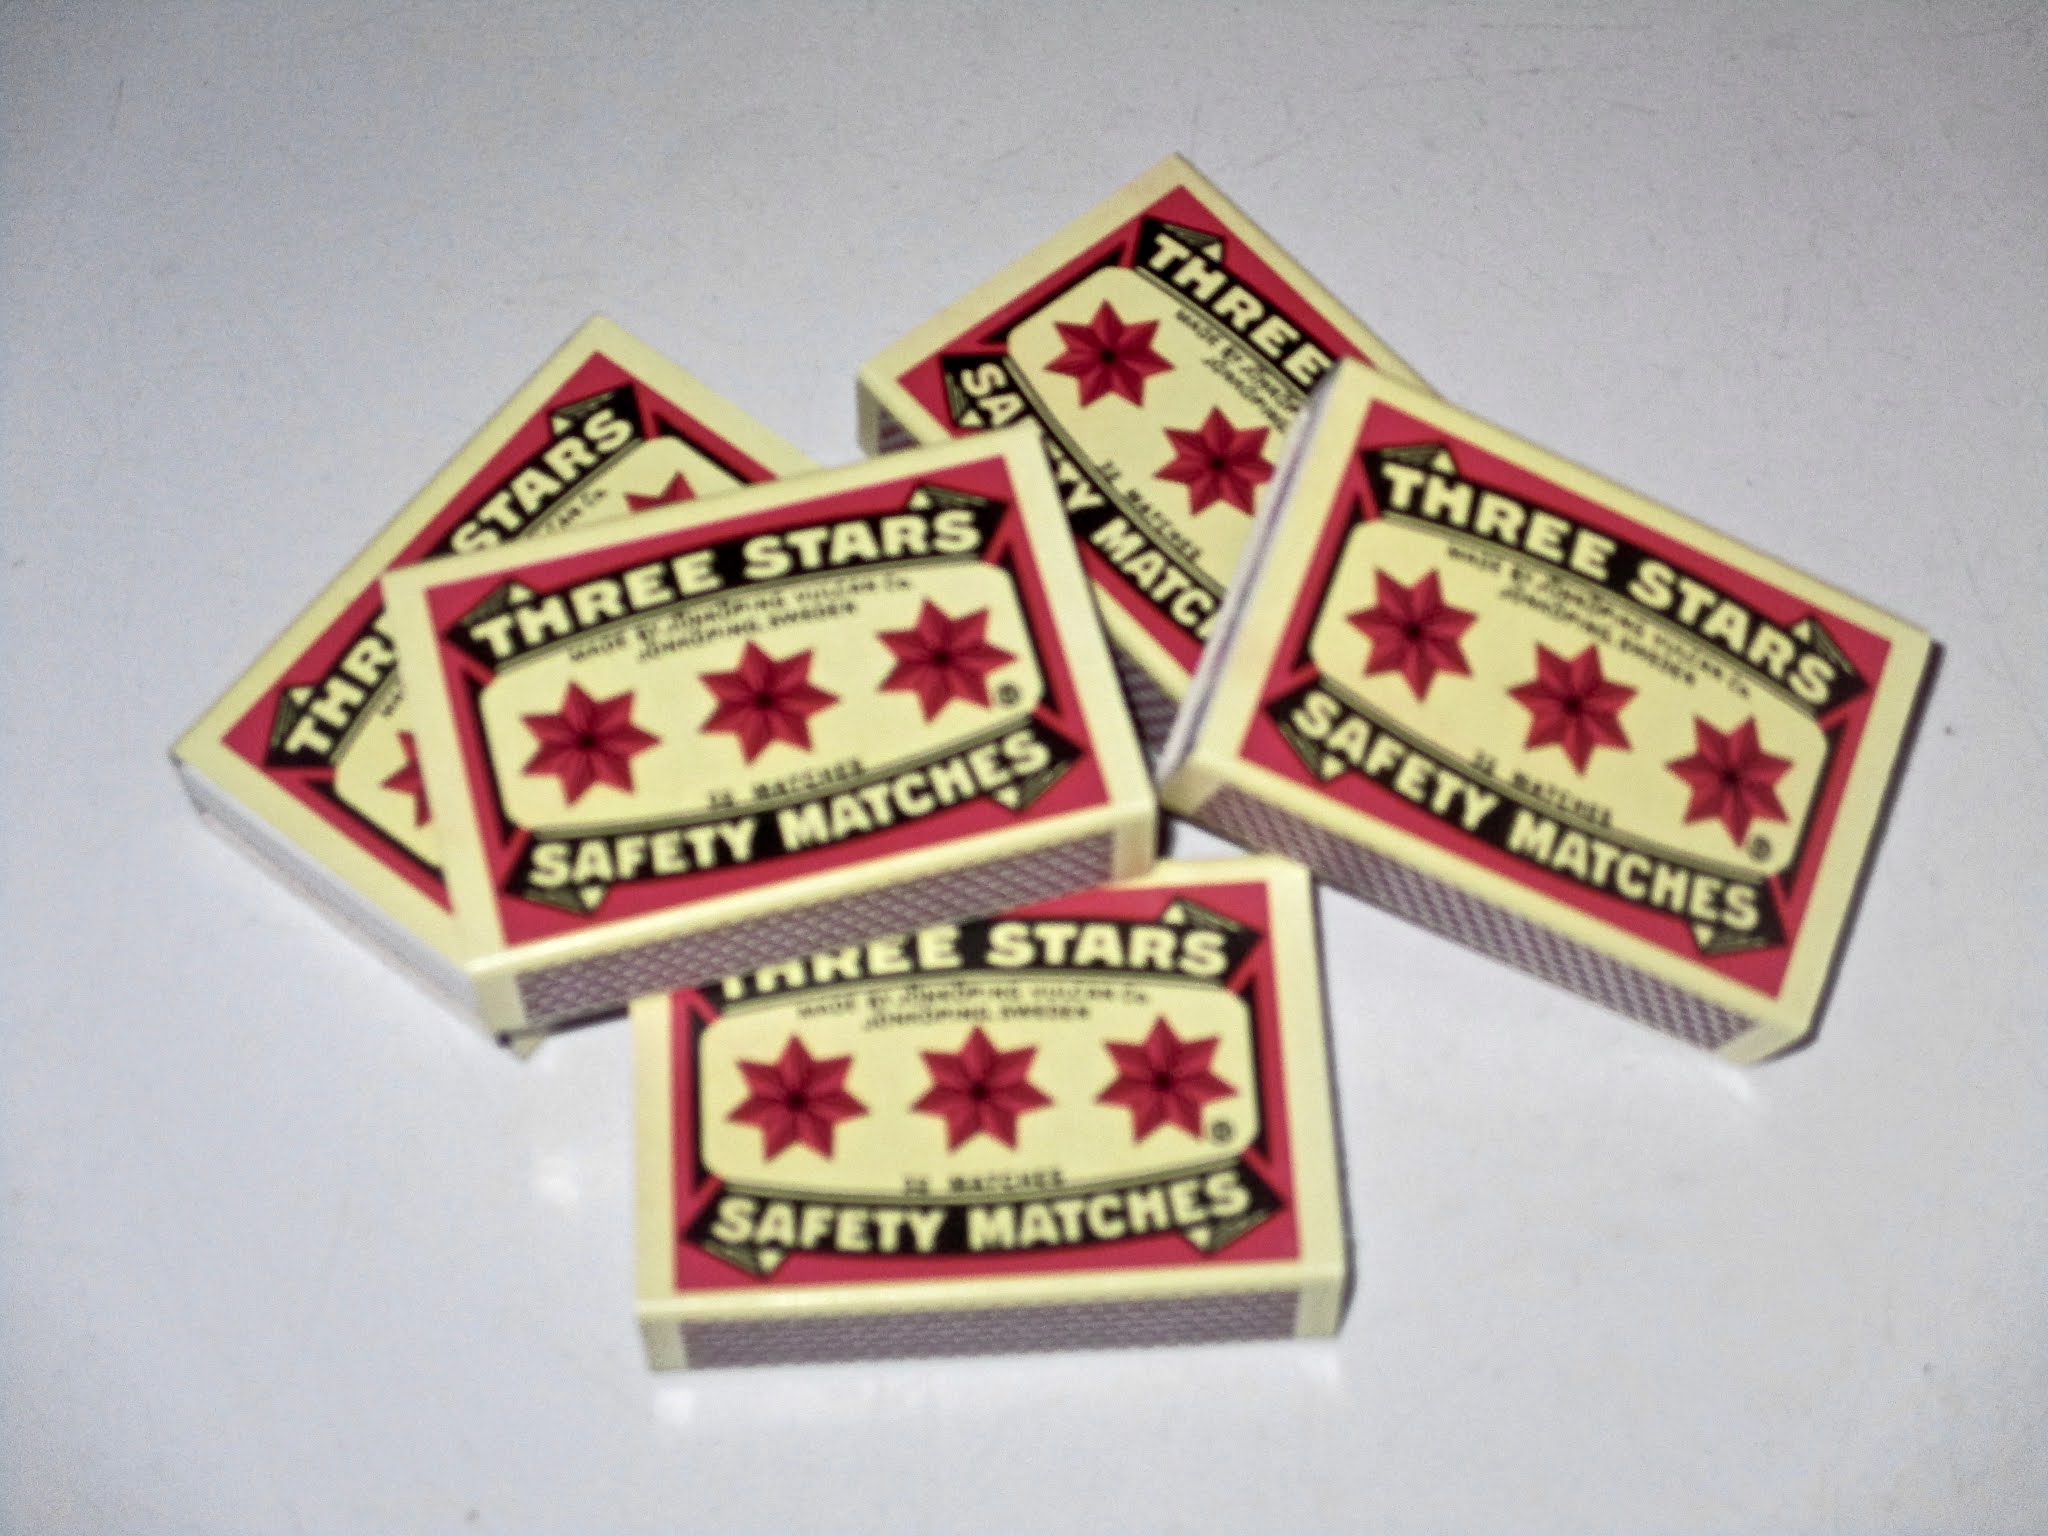
     I have always had a fondness for  miniature boxes of wooden matches in addition to the large ones, and I just had to find ones that reminded me a bit of the Victorian match box covers.   These were made in Sweden, as many of the old matches in the Victorian era were.  I think they're delightful.


    It's such a small, simple thing,  a match, so minor as to be overlooked, but the ability of people to strike a fire without the use of flint and steel was an enormous technological leap forward.  Rather than inserting a small stick into the hearth fire to light something, the match was small, portable, and didn't require an existing fire to use.  As for me, I am finally able to use the Victorian match holders that I've had for years for their intended purpose, and that gives me a great deal of satisfaction.  When I need a match to light a candle or oil lamp or to start the wood stoves, the matches are right at hand, and I don't have to search for the box.   I can just take one from the holder on the wall, strike it on the surface, and use my pretty green match however I please.

    Now that I finally have a match that works, there will be match holders in every room.  The antique stores will be delighted, and I already have a little grinning devil holder (Lucifer?) ready to go.  I wonder if he knows his history? 


Tuesday, February 16, 2021

The Corset

    A corset is part and parcel of wearing Victorian clothing.  This is the first, and likely the only, post about this that I will be writing.  Superstition, misinformation, myths, and downright silliness are about to be exposed.  No old wives tales, though.  The old wives knew a thing or two about corsets, but nobody thought to ask them about it, being women and all.

    When people see me in my Victorian clothes, the question invariably comes up:  Do you wear a corset?  Because corsets are now considered sexy lingerie, the questioner often glances all around the room so they can feel assured that no one else has heard them ask before whispering the question to me.  So here it is:

This is a corset.  More specifically, this is my newest corset:


    As you can see, there's nothing particularly spicy about it.  It's a demure, pale pink satin brocade with pink roses, and it was custom made for me.  It was not inexpensive, but it was well worth it, since it will last years with proper care.  Wearing this is the difference between buying a dress off the rack and having a designer make a dress just for you.  The one might look pretty good, but the other is a perfect fit.  

    So why would anybody want to wear one of these things?  Isn't it an instrument of torture?  What about all the health hazards?  And broken ribs?  And not being able to breathe?  Well, let's take these in turn.

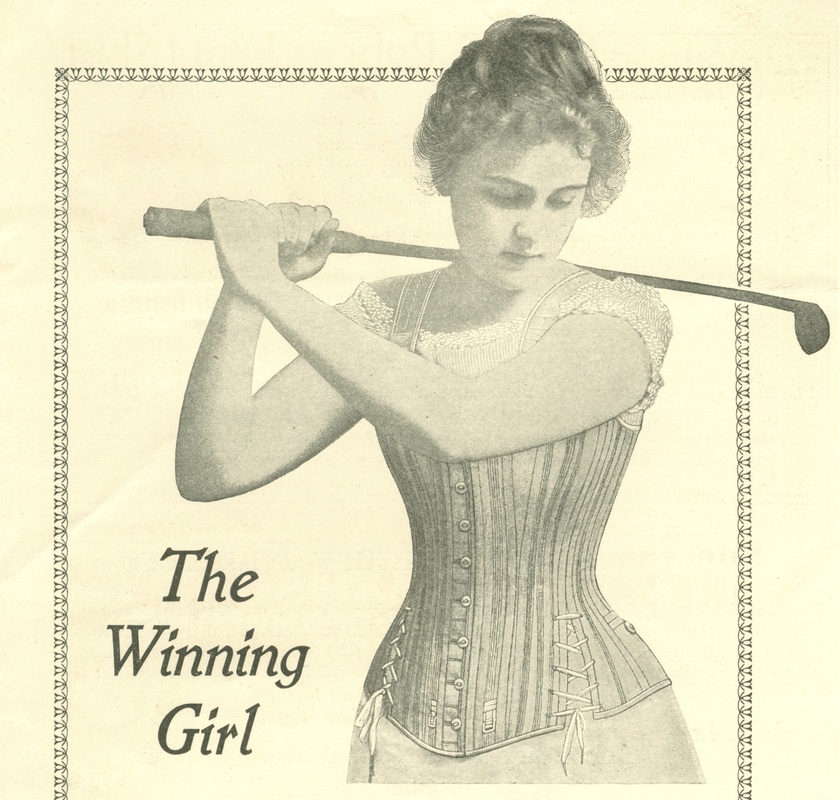
    A real corset is an undergarment.  It wasn't designed as bedroom lingerie, though many are quite elaborate and beautiful   Remember, these things were advertised in the Sears and Roebuck catalog, hardly the Playboy magazine of its day.  The shape of the corset molds the body in a particular way that allows a particular style of clothing to fit properly.  If you're wearing Victorian clothing, which I do, it just won't fit right without one.  A corset is also a piece of underclothing that is designed to shape and support the body, much like a good bra, and it does this job remarkably well.  


    Women have been wearing corsets for centuries.  In the Renaissance, they were called stays or bodies, and every woman wore one - not just the ladies of the court.  Middle class women, farm women, even servants wore them.  Why?  Back pain prevention, for one thing.  For example, if you've been working in the garden for a long time, you'll doubtless remember your back getting cramped and sore as you work.  A corset helps keep your spine straight and works a lot like a back brace, so much  of that back pain is eliminated.  It also prevents slouching, and I find that particularly helpful since I earn an A+ in slouching, especially while working at a computer.  Since you can't slouch while wearing a corset, you sit and stand with a straight spine which makes you appear more graceful and poised.  And who doesn't need a bit of poise now and then?

    Aren't corsets restrictive?  How can you move in that thing?  When I ordered my new corset, I asked my corsetiere (a woman who makes corsets) to design it in such a way that I would be able to go out into the garden or work around the house or chop and stack wood or do pretty much anything at all wearing it.  You can do anything you like in a corset that fits properly.  


Like golfing.


                                                    Or riding a bicycle.  Or  riding a horse.  Or playing tennis.

    High heels are far more restrictive than a corset.  

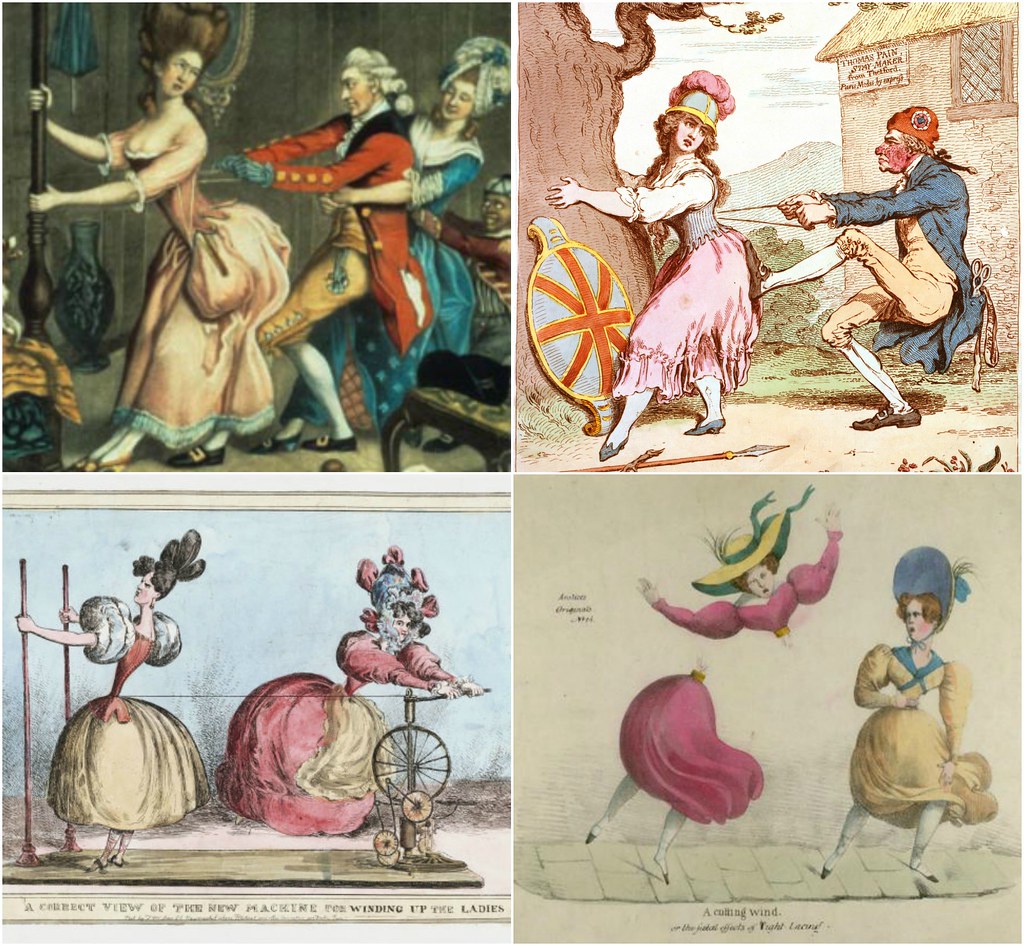
    Can you breathe in that thing?  Well, I've been wearing one for a number of years now, and I'm still alive, so, yes, I can breathe quite comfortably in it.  The stories about women fainting due to their corsets being laced tightly is just another myth.  Women didn't have time to swoon onto chaise lounges.  They had work to do.  

    Does it hurt?  Not a bit if it's properly fitted.  It feels like a full-torso hug.  There are a number of women who find that it helps with anxiety, and an even larger number who find that it really helps with back pain.  I actually feel rather invincible when I'm wearing mine, like some kind of stealth armor.  

    Are you trying to get an 18-inch waist?  No, indeed.  There were corsets for women of all ages and sizes.  

 
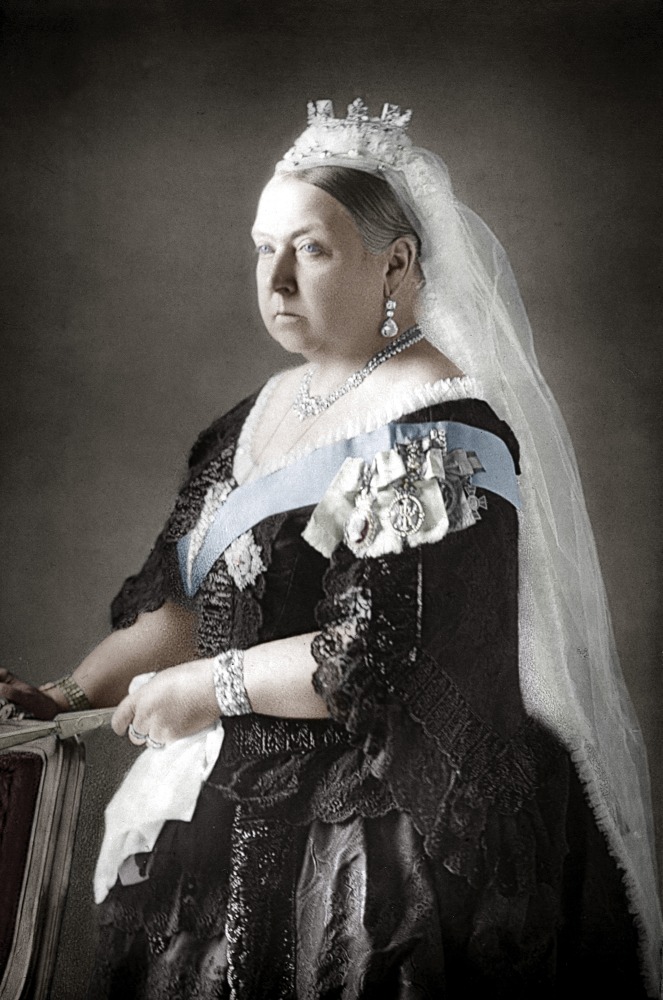
Queen Victoria wore a corset, and nobody would call her a little wisp of a thing.  


    And, no, I don't need to hold onto a bedpost or have someone lace me into my corset.  As millions of women before me, I am perfectly capable of putting it on myself.  As I said, it's about comfort and wearing an undergarment that fits my clothing.  The teeny-tiny waist is largely an illusion created by the cut of the clothing and a truckload of petticoats.  


There were even specially-designed corsets for gentlemen who wanted a trimmer figure and a straighter spine.  Bet you didn't know that, did you?
    Did women actually have their lower ribs removed to make their waists smaller?  Now, let's think about this.  Under what circumstances would a doctor be persuaded to remove your lower ribs today?  Outside of a dire medical need, I can't think of a single situation in which this might happen.  Now consider what medical treatment was like in the Victorian age.  Can you imagine anyone undergoing a surgery like that willingly?  Their chance of survival would be pretty close to zero.  So, no, women didn't have their lower ribs removed.   A corset does reduce the waist size a bit but not to an impossible degree.   If a woman had a tiny waist already, she would have a tiny corset.  If she was a larger woman who wanted her waist to look much smaller, she wore clothing that had a lot of volume at the shoulders and the hemline, and that would accentuate the waist she had while wearing her corset. 

    Well, if they didn't have their ribs removed, what about broken ribs?  Nope.  Wearing a corset is not like being hit by a car: there is no impact or force to break your ribs.  The confusion stems from the words "rib" and "bone".  In the Renaissance through about the late 1700s or so, corsets were frequently stiffened with reeds, also called bends.  These reeds were stitched very close together and formed the "ribbing" in the corset.  If they became brittle, it was possible to break one.  I have done historic re-enactment in a corset of this type, and I broke one of the reeds on the first wearing.  So, yes, I've broken a rib, but not one of my own.  Later corsets were stiffened with baleen, also called whalebone (hence the "bone"), which was much more durable, and eventually they were stiffened with spring steel as they are today (which is a very good thing for whales).

    Don't they squash your internal organs and create medical problems for women?  If that were true, then many of us would not be alive today.  My great grandmother wore a corset, yet here I am.  And Queen Victoria?  She had nine children.  She wore a corset.  Need I say more?  There were special corsets for nursing mothers as well.  

    As I said, women wore them.  All the time.  For all kinds of activities.


For skiing.

For climbing mountains.  

                                                                 
For ruling an empire.

    If it's good enough for "Vicky", it's good enough for me.


Thursday, January 21, 2021

Out to the Woodshed - A Story of Firewood

    Who doesn't love a nice fire on a cold winter's day?  It's all cosy and warm and pretty.  And firewood and fire making are, like many things, more interesting and more complex when you really attend to them.  

    We've learned a lot about fires and firewood over the years, and though we can't heat this house entirely with wood - it was never heated that way, even when it was built in 1896 - we keep a fire burning in the front parlor every day, all day, during the cold season, and it heats most of the main floor during the day so that the furnace rarely gets going until the middle of the night.  


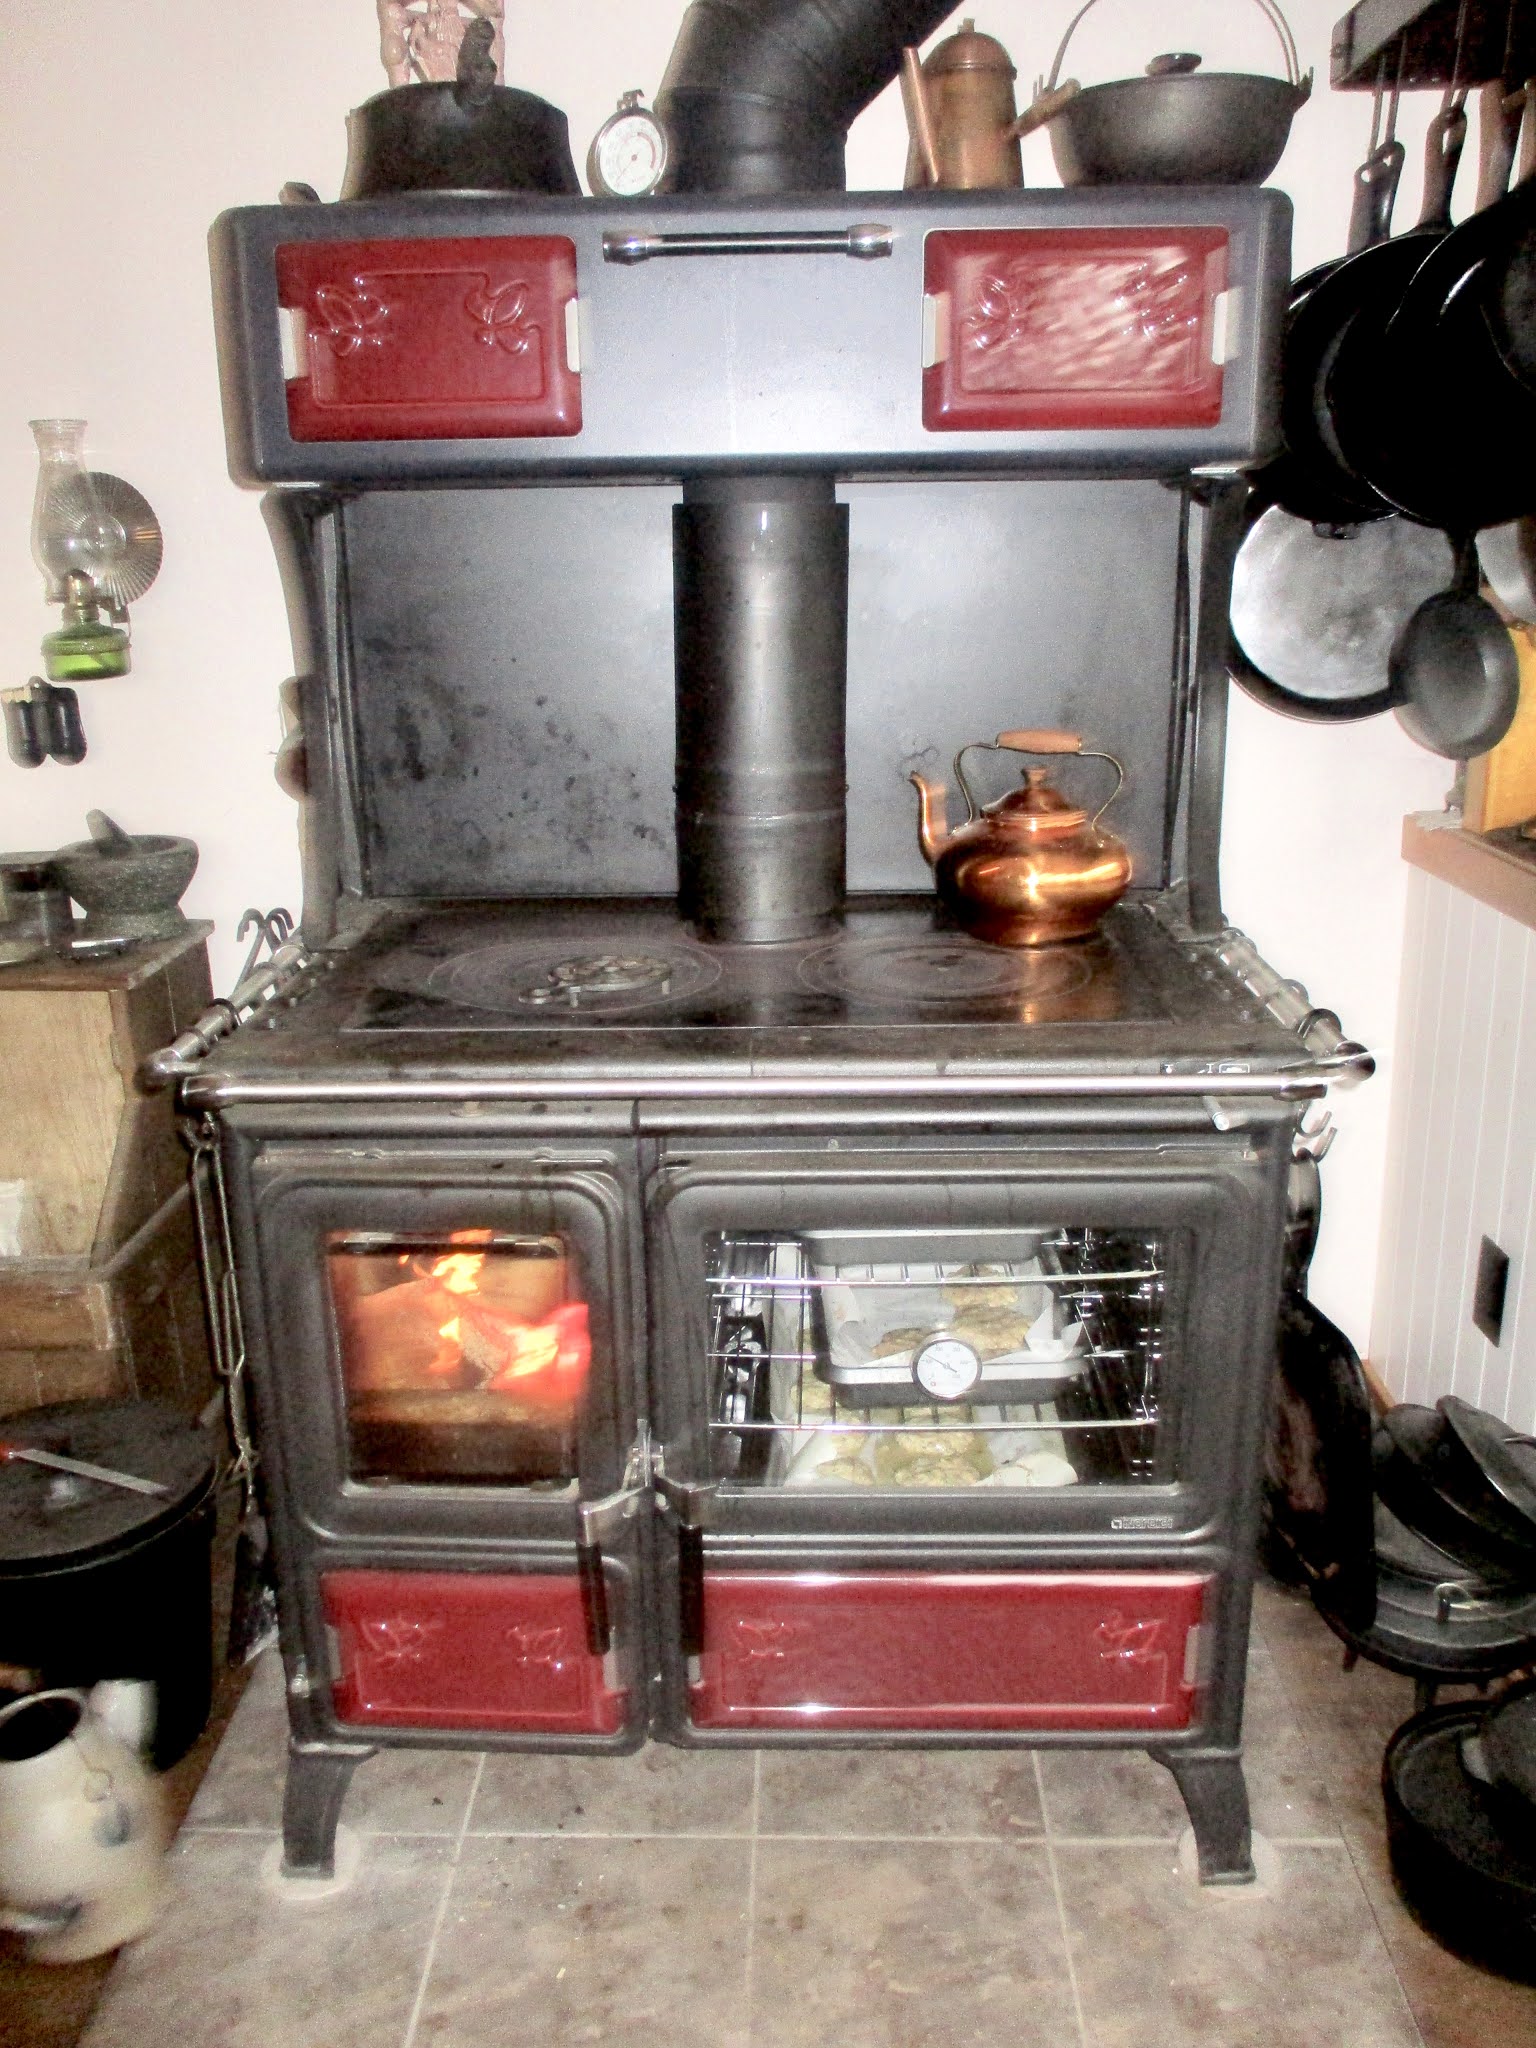
In addition, we fire up Milly, the wood cookstove, on the weekends, and the occasional weekday if I have time to get her going while working, to cook with as well as heat the rear of the house.  I'll provide a tour of Milly in another post.  She's a wonderful stove.


    The most obvious thing about wood stoves is, naturally, wood.  At our house, that means lots of wood.  We bought six cords of it last fall and are working our way through it steadily.  If six cords seems like a lot, I know folks who use twice that much, but they heat their entire house, including hot water, with that amount of wood.  They also have one of those large, outdoor furnaces that eat wood like a kid in a candy shop, but they do the job.  

   Fetching wood in mid-winter from under a tarp that has a layer of ice half an inch thick or six inches of snow on top is not a pleasant task, so last February on a cold and soggy day, I went to see Bill Miller, a local Amish lumberman, about a woodshed. I had first met Bill when I needed to have a chicken coop built, and he later made the hand-sawn oak planks for the floor of the new kitchen when we remodeled it and added Milly, the wood cookstove.  Over the past few years, I've become something of a regular with Bill, and we have talked about the relative merits of different models of wood stoves, how to get rid of creosote, and raising chickens. I think he's amused by this peculiar English woman who shows up in Victorian work dresses to discuss another project with him.  He's always very kind, but I can see a twinkle in his eye and a subtle grin on his face when he sees me jumping out of the van.  I suspect I may be a topic of conversation at the dinner table that evening.

    In addition to running his sawmill and lumber yard, Bill also sells pre-fab sheds in various sizes,  and because we want to support his business, and we definitely needed a woodshed, we bought one from him with the proceeds from our stimulus check:  an 8 x10 shed, painted to match the chicken coop, which would hold four cords of wood.  On a sweltering day in late summer last year, the shed arrived and was placed with due ceremony on the concrete pad where the previous owners had parked their RV.


    As the weather began to turn toward autumn, we started buying wood, two cords at a time, and loading it into the shed.  It takes a remarkably long time to fill an 8 x 10 woodshed, especially if you need to stop every few days due to rain. 

    If you're going to make heating with wood workable when it's really cold and snowy outside, the wood can't be just piled in the shed any old way.  We stacked the wood in layers, from the back to the front, as high as we could reach but not so high that logs would come tumbling down on our heads.  This was the point at which Harvest and I fervently wished we were taller so that we could stack more in.  Within each layer, there had to be a mix of different sizes of wood - really large pieces for the "overnight" logs in the parlor stove, and smaller, shorter pieces to fire up Milly.  We tossed the fist-sized chunks which arrived with every load into plastic garbage cans to save for kindling, and we took the skinny pieces into the basement as fire starters, piling them into two neat stacks just at the bottom of the stairs.   If it was burnable, we kept it.  We worked on it, one layer at a time, for what seemed like ages.  The shed held just a little under four cords, and we stacked the last two cords on the existing wood racks behind the shed. 

    For those who are not familiar with what a cord of wood means, there are three "faces" to a cord.  Each face is eight feet long and four feet high.  The logs can be any length, but 16 - 18 inches is about standard.  If you buy a full-sized wood rack, that rack will hold a face cord.  Three racks like that will give you a full cord of wood.  Three racks per cord times six cords of wood is 18 racks worth of wood - a lot of racks - so a shed was inevitable.  

    By the way, I don't recommend that you buy your wood from one of those posh sellers in the city.  Find someone who has a tree service and inquire there first.  They can often provide you with hardwood, which is what you want, for considerably less than a fancy wood seller, and they will often deliver it free or for a nominal fee.


After the shed was filled, we went hunting for birch bark and pine cones. 

Birch bark is an amazing substance.  It burns even when it's wet, and it's a fantastic fire starter.  A strip or two of birch bark underneath your kindling will catch fire quickly and burn hot and fast with a menacing sizzle.  I particularly like it for firing up Milly since she has a small firebox and can be a bit temperamental.  She doesn't like to be stuffed with paper, but she'll fire up just fine with some strips of birch bark under the kindling.

    You can find lots of birches in the woods around here and just peel the bark off  dead branches and downed tree trunks (never peel it from a living tree).  Peeling the bark off a branch is  quite satisfying, sort of like unwinding a toilet paper core or one of those Pillsbury biscuit tubes.  It's light, so you can collect a lot of it, and it's quite tolerant of being squashed.  And who doesn't like a tramp in the woods on a nice fall day?  It's a great excuse to get out for a little exercise and fresh air.  We tossed our birch bark hoard into a tin washtub next to the kindling stacks in the basement.  

    Pine cones are another great fire starter, though they are somewhat slower to catch fire and require something underneath them like newspaper.  They burn less fiercely than the birch bark, but they last longer  The two in combination are a winner, and gathering them is an excuse for another excursion into the woods.    


    Harvest goes one better with the pine cones and finds old wax candles by the pound at a local thrift store.  She melts them down, ladles the hot wax into a small muffin tin, adds a pinecone as a wick, and she has a long burning fire starter.  These are the sort of things you find around the winter holidays and pay handsomely for.  You can make them yourself for pennies.  

    Lastly, there is a technique for building a fire just like there's a technique for stacking wood.  Each stove or fireplace will be a little different, but the basic principle is to make sure there's enough air for the fire to burn and catch the wood.  If you don't give it air, all you'll achieve is a smoky, smoldering mess that will use up an entire newspaper and half a box of matches to get going.  

    Harvest lights our parlor stove every morning.  Here's how she does it:  


    First, she lays two pieces of kindling lengthwise in the stove - one at the back and one at the front.  She then builds a nest of newspapers between them and adds a couple of pine cones and maybe a wax fire starter in the middle.  

    She then puts another layer of wood at an angle to the kindling layer and then one last  layer of wood lengthwise on top, leaving plenty of room for air circulation between the layers and making sure that the wood is not too large.  The heavier logs can be added later when the fire is good and hot.    

    Strike a match, touch it to the paper and hey, presto!  A nice, roaring fire in  moments.  

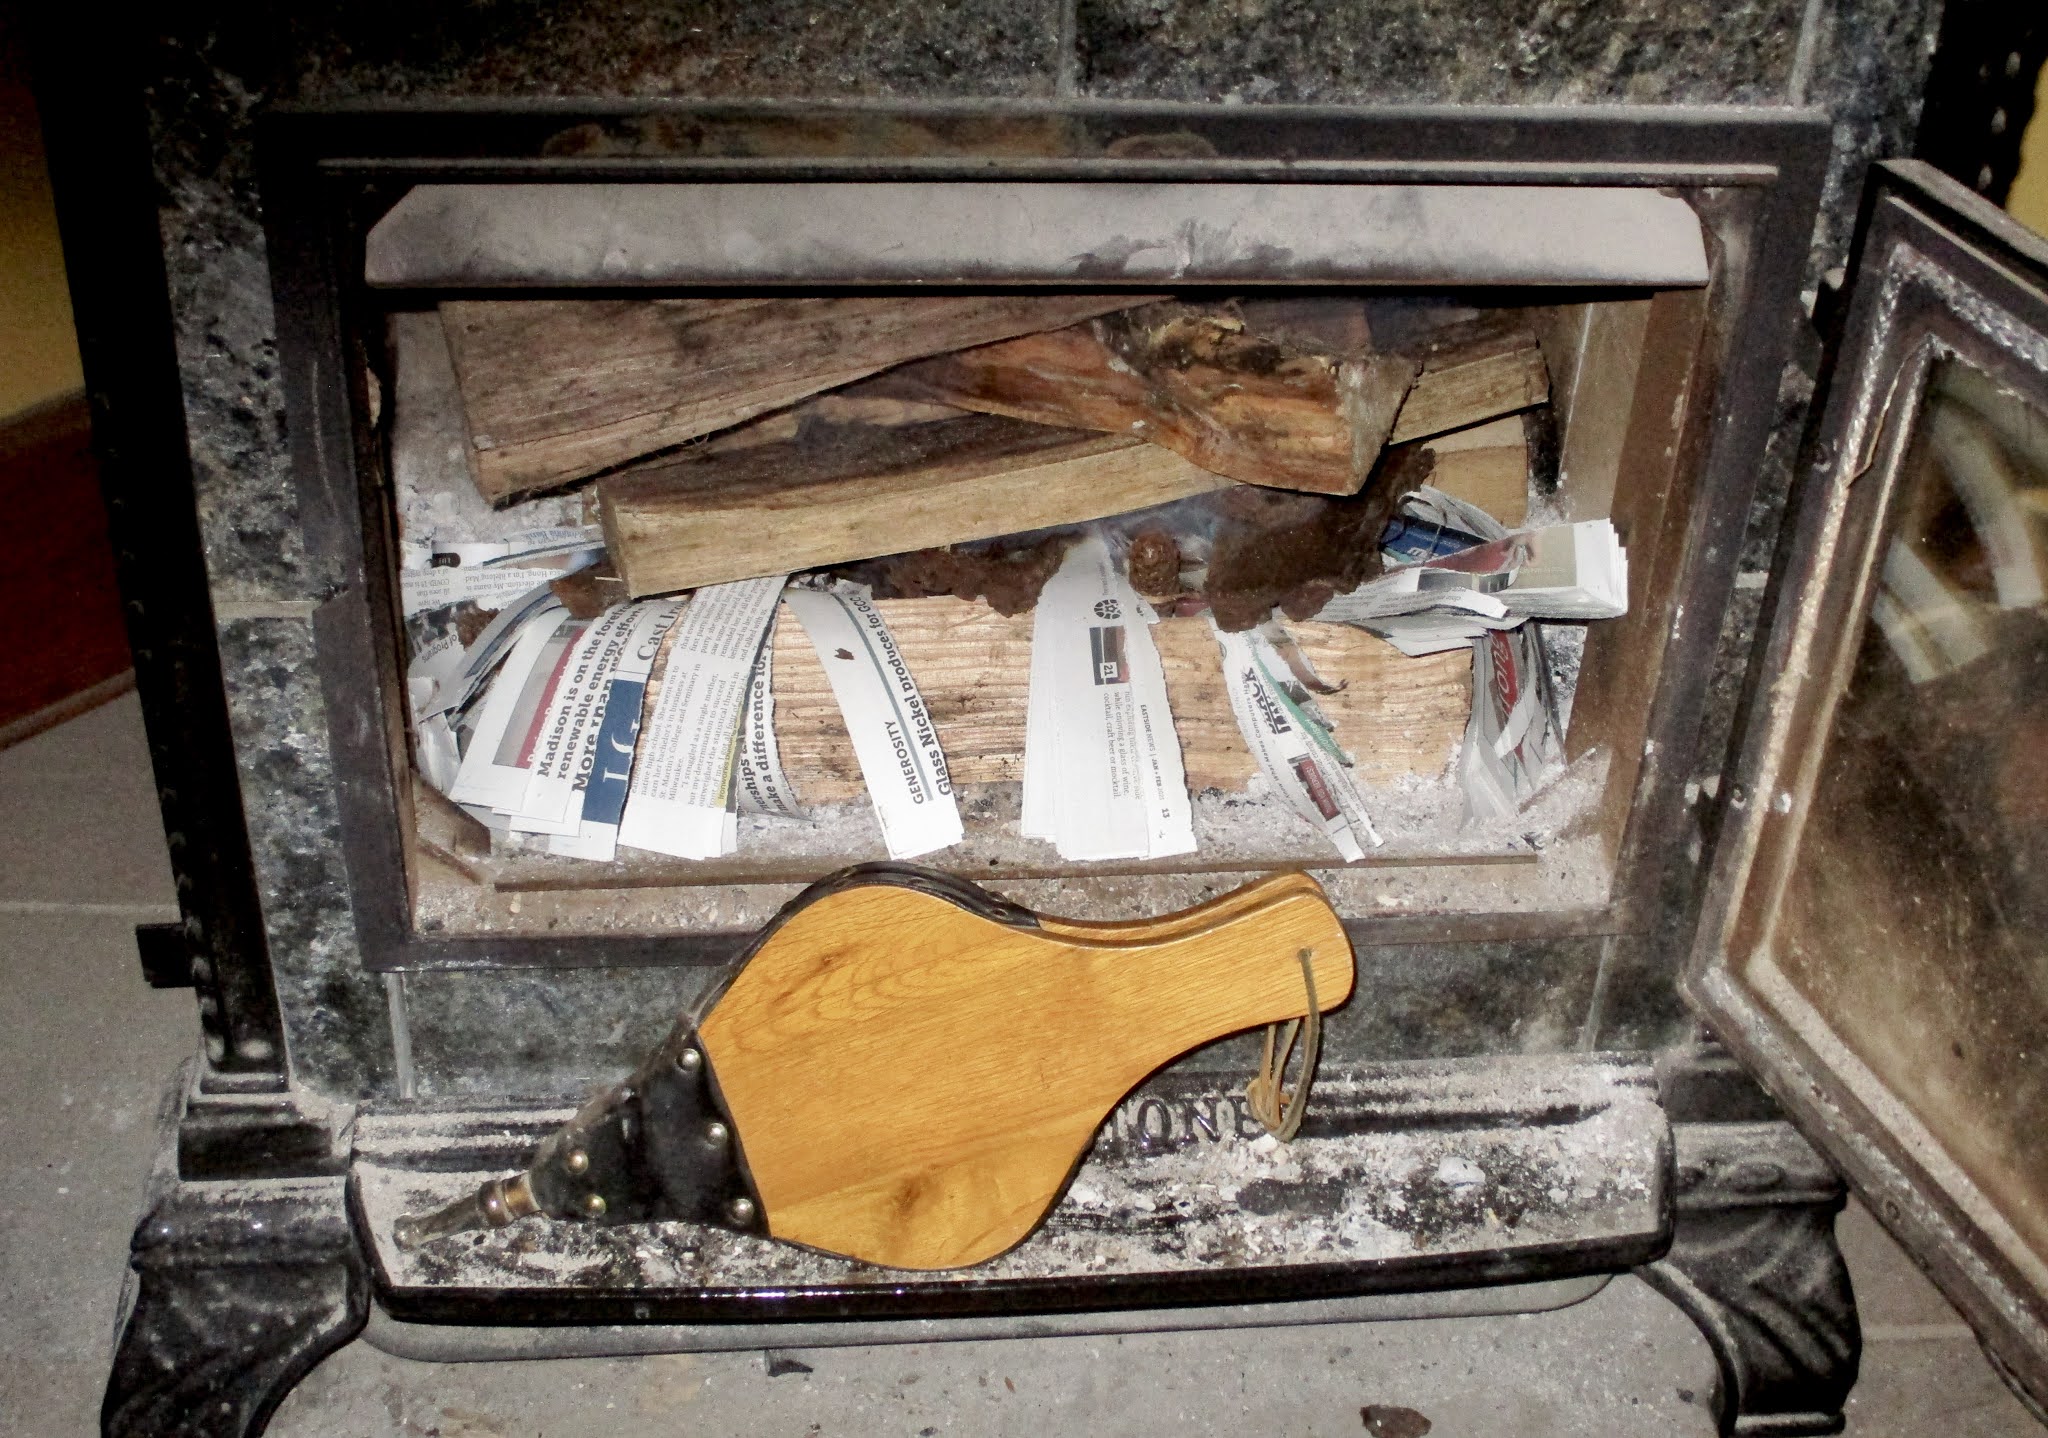
    I used to be the fire builder in the house, but since she's learned to do it, Harvest has become She Who Lights the Parlor Stove, and I am now relegated to She Who Maintains the Fire.  Harvest has been quite put out with me when I've let the fire burn down to the point where a new log won't catch properly when it's added and the bellows must be used to get it to light.    I'm the one who puts the last log on at night, the bigger the better, and lowers the draft so that the wood doesn't burn too fast.  To be fair, though, I am She Who Lights the Wood Cookstove, and Harvest will bring me wood to do it, but she finds lighting Milly much too fussy for her taste.  Balance in all things.

    Since we have now cleared away the old wood racks which were next to the new wood shed, we have decided that we need to replace the racks with another, smaller shed to hold those last two cords of wood.  Just imagine, six cords of wood in two woodsheds, under cover and dry, with no tarps to wrangle around in the snow.  Sheer heaven.  

    And Bill Miller will have another chance to sell us a shed and to sit around his dinner table and talk about me again.   It's a win-win.  


August - Peaches, Tomatoes, and Flax - Oh, my!     August this year seemed like a month suspended in time followed by an insane rush.  After...