Saturday, September 24, 2022

August - Peaches, Tomatoes, and Flax - Oh, my!


    August this year seemed like a month suspended in time followed by an insane rush.  After months of waiting for a real harvest from the garden, the beans and tomatoes exploded in their bounty, and there was no time to put everything up.  

    Harvest froze the green beans, then planted another crop, and I put up 18 pints of tomatoes (since there are just the two of us, we prefer pints to quarts).  Time got the better of me, though, and several bags of tomatoes are in the freezer awaiting their turn to be canned, and they still keep coming.  It's tomato-mageddon out there. 


The tomatoes join the peaches already in the freezer which were purchased at the local Amish school auction, held annually just a few miles down the road.  Every year boxes of peaches and quarts of Amish-made Wisconsin maple syrup come up on the auction block between hand-woven rugs, handcrafted wood items, and spectacular hand-made quilts including a truly magnificent one which sold for just over $2,000 this year to thundering applause from everyone in attendance.  It's been a couple of years since we last bought a box of peaches there, and I wanted to make peach jam this year, so I bought a nice-sized box thinking I would be able to make jam the following weekend.  Jam was not in the cards.

        I am inordinately fond of peach jam.  When I was young, my mother, being a thrifty woman, bought strawberry jam in 4 lb. tins.  I can still remember the brand name - Empress - and the design: a light blue on white lattice affair, very mid-1960's.  I have no idea how many tins she purchased at a time, but knowing my mother, she probably bought them by the case.  It was the only jam we ate, day in and day out, and I came to loathe strawberry jam.  The tins of jam lasted forever.  You would finish one tin and another one would appear out of nowhere. It was jam purgatory.  My mother, however, failed to appreciate this.

    I prayed for grape, apricot, anything to relive the unremitting boredom of strawberry jam, and the only time I got anything else was when we were at my aunt's house, which we visited perhaps twice a year.   There my sister and I could indulge ourselves in peanut butter and grape jelly sandwiches, or peanut butter with honey, a true luxury.  To this day I am reluctant to eat strawberry jam when there is anything else on offer, and peach or apricot jam are my favorites. I had intended to jam the peaches we had purchased at the auction and indulge my craving right away, but time slipped away, and into the freezer they went, snuggling up to the tomatoes, to wait for another day. 

    In addition to the standard Martino Roma tomatoes we plant every year for canning, Harvest planted a few really interesting tomatoes for fresh eating that are worth sharing with you.  


    The Black Strawberry tomato on the left side of the bowl is truly almost black with a blush of red on it.  The flavor has an unusual, floral overtone.  The tomatoes are about the size of an apricot.  The harvest period didn't last long, but while they were on the vine, they were wonderful.

    The Micro Tom, shown in the top and lower right of the bowl,  is a tidy, miniature bush tomato that fits perfectly into a hanging planter and grows a surprising number of cherry-type tomatoes.  Harvest hung three baskets off the arbor next to the barn at an appealing eye level, ready for snacking.  It's September now, and they're still going strong.  

    The most unusual tomato she planted is the Spoon Tomato shown at the left side of the bowl and the bottom of the bowl.  These little darlings virtually explode on huge and exuberant plants and grow streamers of tomatoes.  The strings of tomatoes look like snap-together plastic beads for kids and go from red to green on the same chain.  If left on the vine, the green ones on the bottom continue to ripen even after the red ones at the top have been eaten.  The tomatoes are about the size of a large blueberry, and it's irresistible to simply graze away on them while wandering around in the garden or doing outdoor chores.  Bear, who is ever patient when it comes to treats and won't eat anything without permission, snacked his way through dinner with me - one for me, one for you, one for me, one for you.  After discovering that there were still some tomatoes within corgi reach, he happily continued munching away on his own while I stacked wood, his little corgi butt sticking out of the bush while his nose was buried within sniffing out more goodies.   He does love his veggies, and they seem to have had no deleterious effect on his system.  I have determined, however, that next year we're going to espalier them along the garden fence since they are so abundant that it's nearly impossible to reach the ones in the middle of the vines.  They will make a very colorful wall.   They, too, show no signs of slowing down.


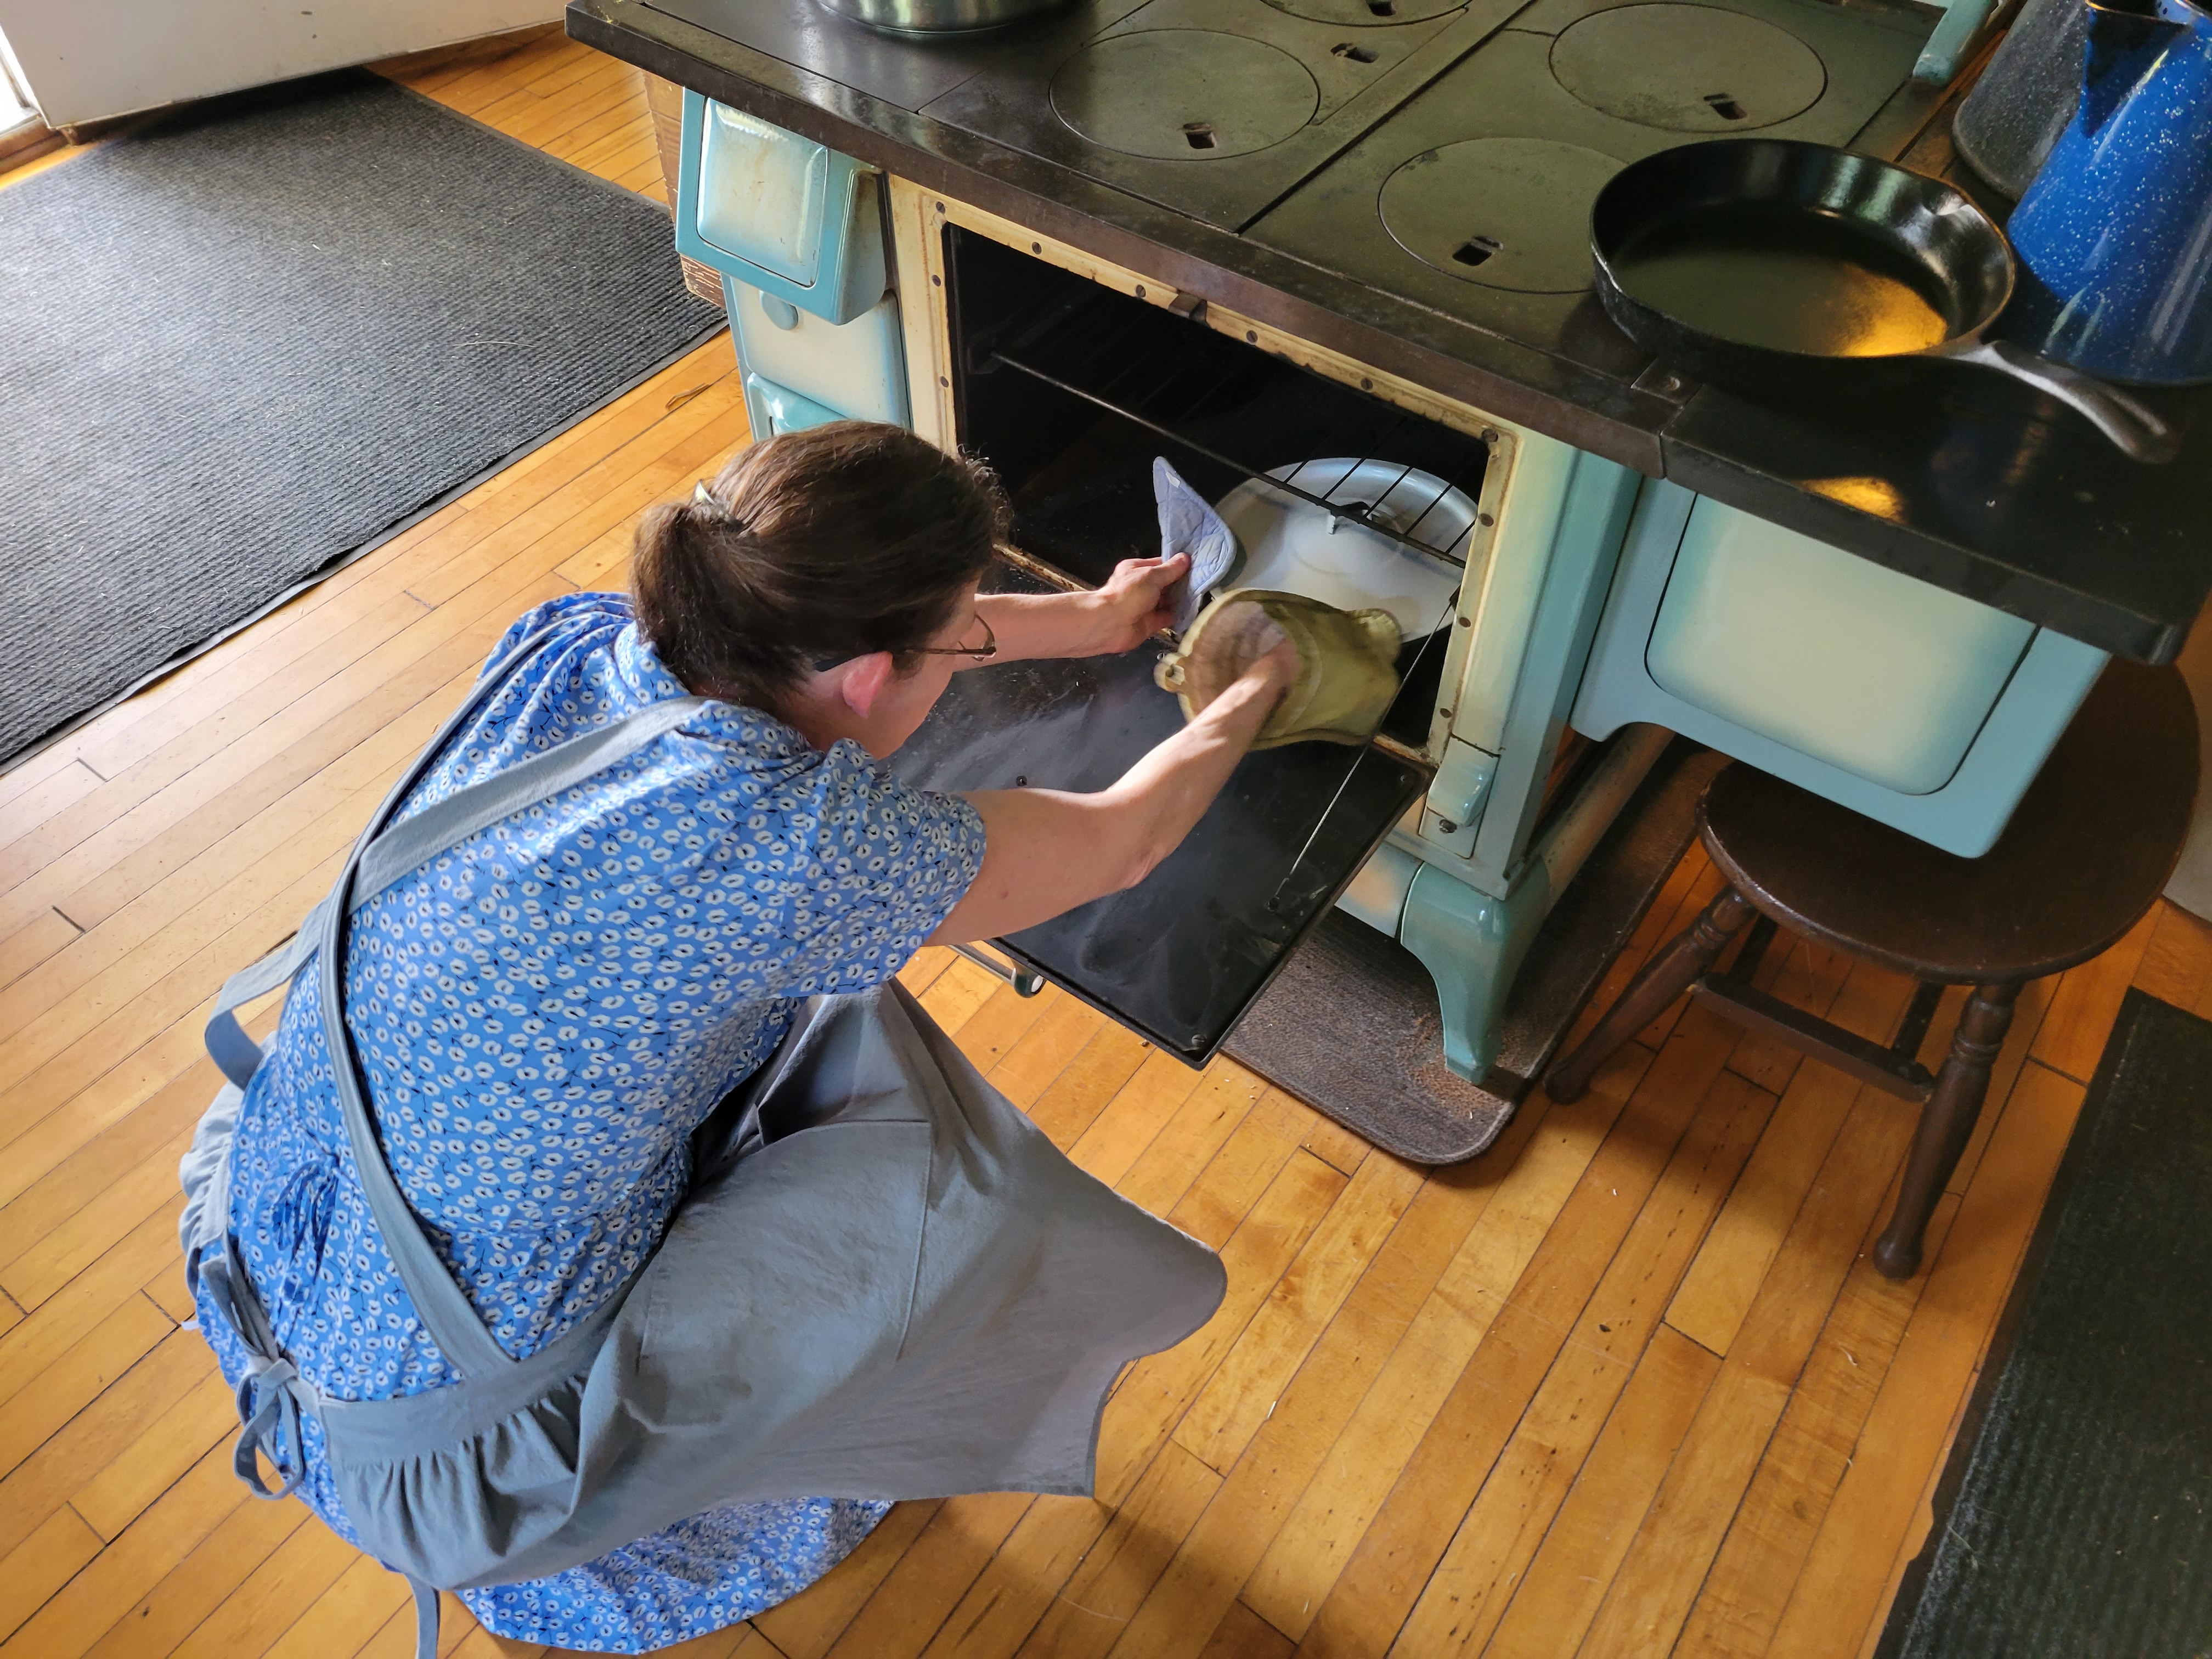
    Mid-August found me doing a reprise of the flax growing, processing, and spinning workshop with Scott Johnson of the Low Technology Institute.  (For more information on the history of growing and processing flax into linen, see last year's September post - "Flax to Linen the Low Technology Way.")  We had gotten good reviews from last year's workshop, so we decided to do it again.  There were four students this time, one coming from as far away as Appleton for the weekend, indulgent husband and two tween children in tow.  I always feel so honored to teach when someone is willing to drive so far to learn.  The family stayed at a local B & B, and dad and the kids found all kinds of interesting things to do while mom was learning all about flax.

    Sadly, the flax crop hadn't done well this year at LTI, but there was plenty left over from last year, so we went at it with gusto, first breaking the flax between the jaws of a wooden contraption called, not surprisingly, a break. Chaff dropped all over the ground like tiny bits of hay. Good thing it wasn't windy.

                          Breaking the flax

    We then took a scutching sword to it.  This looks exactly like a toy wooden sword, and you whack away at the flax to get more chaff off it.  Every time I see a scutching sword, I think of little kids playing pirates ("Avast there, matey!").   All the while you are breaking and scutching, the amount of flax in your hand gets smaller and smaller as the chaff falls away.  It's rather disheartening.  And it's not finished yet.


    Hackling the flax - combing out the flax on a board with three sizes of nails - made each bundle smaller yet as the shorter fibers were left behind.  Scott scooped up these short fibers, called tow, and tucked them away like a magpie.  He uses the tow for spinning twine.  We tease each other about this, since I want the tow for fire starters, which is absolutely horrifying to him.  He does make a nice twine with it, though.


          Flax hackles - beds of nails

    By the time all the breaking and scutching and hackling is done, only 10% of the bundle you started with is left: a soft, shiny handful of fine, two-foot long fibers no larger in diameter than a broom handle.  In other words, not a lot.  This is the stuff you spin into linen thread, and this is the reason linen is so darned expensive.  It takes a lot of flax to make just a little bit of spinnable fiber.  Our ancestors must have really valued the end result to take such time and effort for such little return.  Sheep produce far more for the money, but wool can be decimated by moths, leaving nothing but fine dust where your favorite sweater used to be.  Truly, there's nothing like flax, and the darn stuff lasts forever.  Seriously.


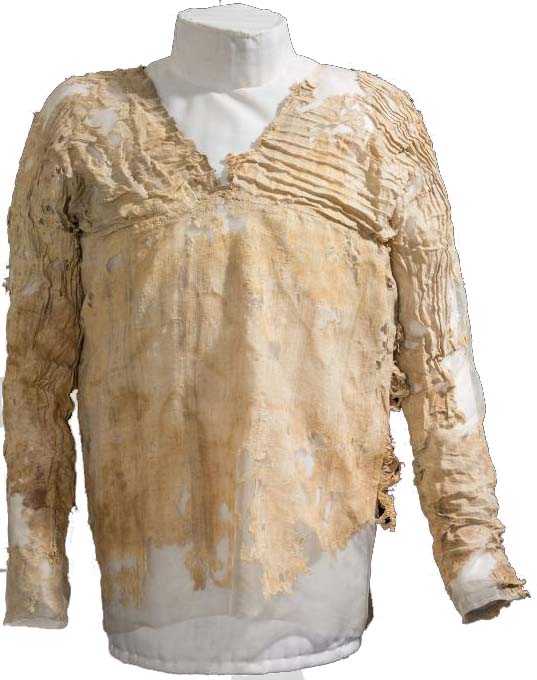
The  5,000 year-old Tarkhan woven linen dress.  Now that's durability! 
And those threads were all spun with a drop spindle (not a spinning wheel), and they're as fine as any linen today.  
There are even pleats!

    "Dressing" the distaffs - putting that hackled hank of fiber onto poles that hold the flax so it's ready to spin - took hours on Saturday.  I told the students it would, but nobody ever really believes me until they do it.  Rush this part of the process, and the rest is just plain misery as many, including me, have discovered.  Alas, there was some rushing.  There always is.  

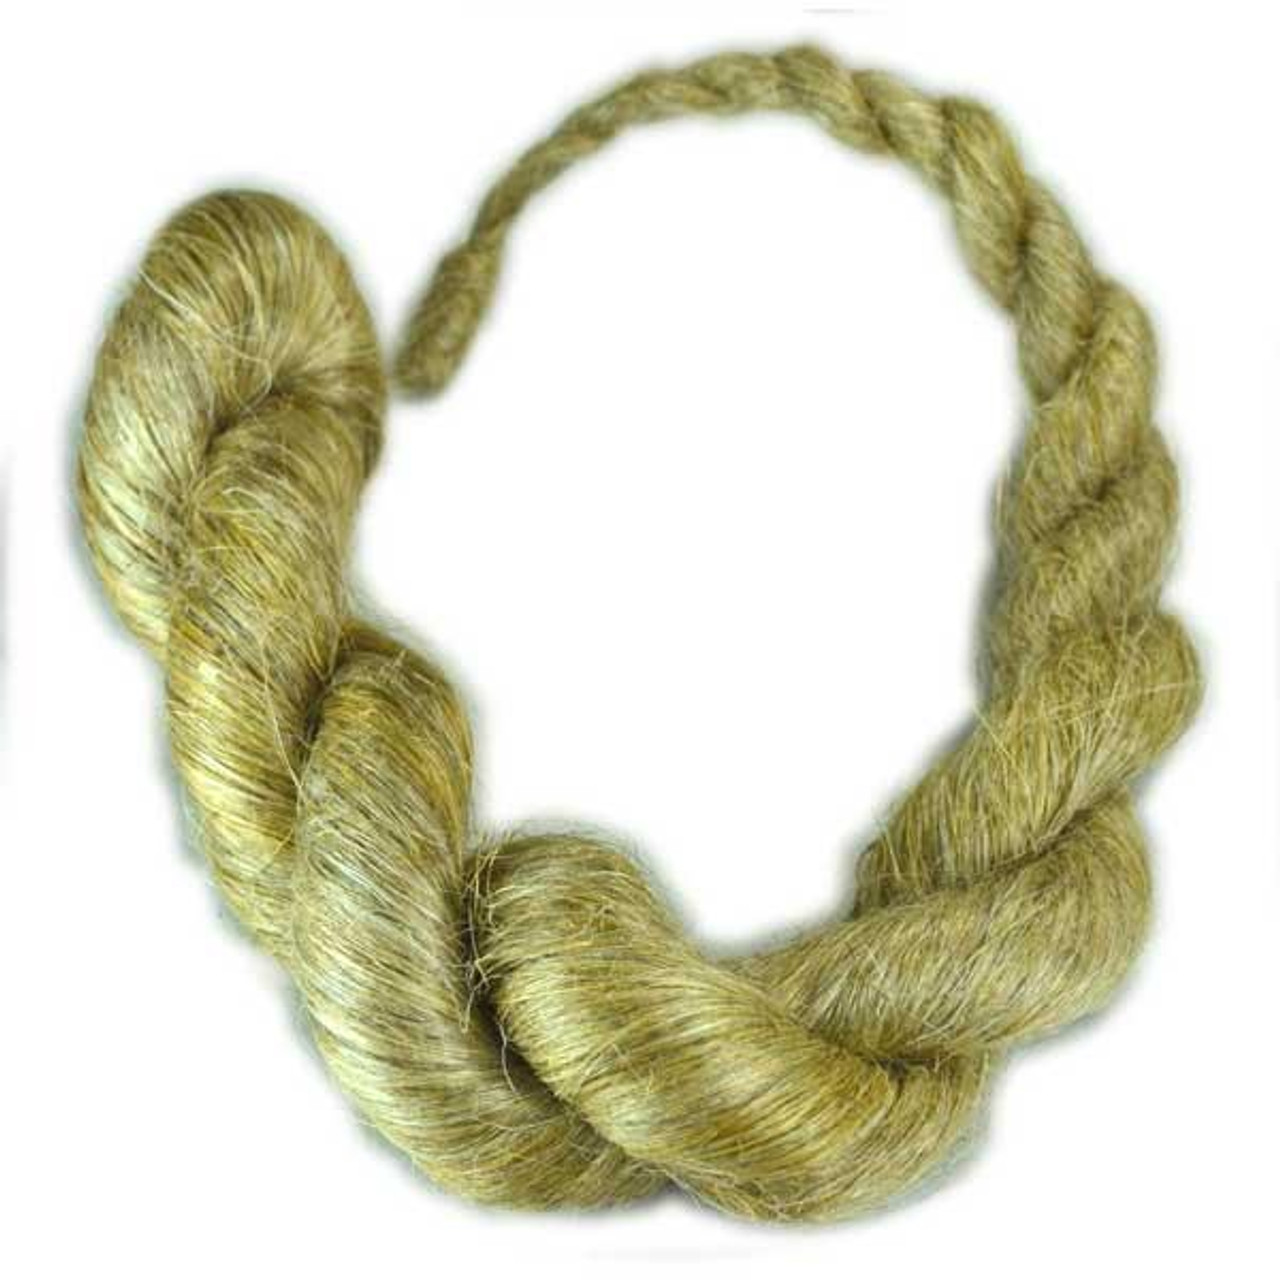
                                                                                     A strick of flax after hackling, ready to go on the distaff

A "dressed" distaff
 
    On Sunday we arrived at the final stage of all the prior effort: spinning the flax fiber into linen thread.  Before the fiber is spun, it's flax; after it's spun, it's linen.  The line of transformation is the space between the spinner's two hands, which is pretty magical if you think about it.  The two experienced spinners went to it with a will.  They quickly discovered that flax can be fiddly and persnickety, and they had  to dump pretty much everything they knew about spinning wool in order to learn to spin flax.  

    Flax can be a joy to spin once you have the rhythm, but finding that rhythm can take some doing.  Imagine being Ginger Rogers (For those of you too young to know about such things, she was Fred Astaire's dance partner.  Who was Fred Astaire, you ask?  Oh, never mind.).  Imagine dancing backwards in heels.  Now add five balls to juggle at the same time.  Smile while you're dancing and juggling.  That's spinning flax.  Once you've got it, you've got it;  it's getting it that takes practice.  By the end of the afternoon, the two experienced spinners were getting the rhythm of it.  By the way, I've heard tales that children as young as five were able to spin flax.  I don't believe a word of it.  The manual dexterity required just doesn't exist in five-year-old hands.  Wool?  Maybe.  Flax?  Nope.

Linen thread

    But wait, I hear you cry.  Weren't there four students?  What happened to the other two?  Did I mention that two of the students had never spun before?  I didn't, did I?  Not a lick of experience.  Nada. Zip.  Zilch.  I had some qualms about this, but ever the optimist and brave explorer, Scott figured they wouldn't have to unlearn anything if they didn't know anything at all, so we gave it a go, and I tried to teach brand new spinners to spin.  With flax.  On a spinning wheel.  What could possibly go wrong?  

    Since we hadn't anticipated four spinners, we had to improvise on providing them with spinning wheels.  One of them was assigned Scott's "frankenwheel" - a re-fitted spinning wheel with very rustic parts Scott had fashioned himself - and the other worked away with a temperamental vintage Ashford wheel from the 1960's.  Not ideal conditions, even for teaching spinning wool, let alone flax.  Bless them, they gave it their all and even managed to spin a bit of flax. For some reason known only to the goddesses of spinning - and there are many - they actually enjoyed themselves, especially after I had them set the flax aside and started to teach them how to spin wool.  Their shoulders came down from around their ears once the flax was put down,  They took their dressed distaffs home with them.  I assured them that the distaffs and flax could sit quietly in a corner adding ambience to their room, and they could come back to it when they had a bit more experience under their belts.  As I said, it lasts practically forever.

    And there we were, the six of us, sitting in a circle in Scott's garage/workshop with the door open to the yard:  Scott spinning twine from his flax tow; the two experienced spinners alternately learning how to spin flax and helping the new spinners with their wool; and me flying back and forth trying to demonstrate how to spin flax, coach the experienced spinners, and teach new spinners how to use a wheel and spin both flax and wool while not colliding with any of the five spinning wheels. To (badly) paraphrase Winston Churchill: it was multitasking's finest hour.  There was hot tea and cold water and three varieties of Scott's homemade pickles to sample and enjoy, and rain that bucketed down late in the afternoon leaving mud puddles everywhere, and stories, as there always are at LTI, and a lot of laughter.  The new spinners weren't in the least daunted, and they both want to learn to spin in earnest - but wool first, thank you very much.

    Scott is still determined to weave a shirt for himself, and after this workshop, I think we may now have enough flax for me to begin to work on spinning the thread for it.  There's going to be a lot of time on my hands this winter, but there's a lot to do between now and November when the snow starts to fly.  I'd better crack on with it.  Scott, meanwhile, needs to learn to weave which, I am sure, is going to be a story of its own.

    In closing this month's post, I must bid farewell to Her Majesty, Queen Elizabeth II.  I'm not a royal watcher, but my father came to the US from England when he was a boy, and I was raised as an English child in Southern California, which is weird.  My mother taught me how to drink tea properly "just in case you ever have tea with the Queen."  Well, mum, I never did, but I'll miss Her Majesty all the same.  


Queen Elizabeth II
1926 - 2022


Sunday, August 21, 2022

July - When Life Gives You Apples 


                                                            An attempt at apple jelly

    The law firm where I work has a basket of fresh fruit available for snacking on each of the four floors the firm occupies.  This luxury impressed me when I went to work there.  It still does, actually.  The baskets include bananas, apples, and oranges.  The bananas are snapped up almost as soon as the basket arrives, and the oranges and apples slowly disappear from the basket throughout the rest of the week, but invariably some of the fruit is usually left over, and most of that is apples.  

    Rather than have the leftover fruit thrown away, I volunteered to take the leftovers home with me and feed them to the chickens or compost them.  Most of the time the amount is manageable, but at the beginning of July, I was handed a banker's box of leftover apples weighing a good 10 pounds or so - far too much for the chickens to eat.  Something had to be done with them.  

    I've made jams for years and apple butter forever. (Recipe for apple butter: Peel and core apples. Cook them for as long as it takes to weed the garden or watch a good movie - your choice. Spice to taste. Mash, mash, mash, mash. Put in jars.  10 minutes in a boiling water bath. Done.)   

    I thought  it was time to try my hand at apple/mint jelly, the kind that we used to put on lamb when I was a kid.  With visions of sparkling golden jelly, I grabbed the 1896 edition of the Fannie Farmer Cookbook and Blue Ribbon Preserves and set to work.


    As instructed, I quartered the apples, put them into the big canning pot, skins and all,  with enough water to almost cover them, adding the amount of sugar called for in the recipe, a bit of butter to avoid foaming, a touch of salt, a little allspice,  and a handful of the spearmint that grows on the side of the house and refuses to be stopped in its attempts to invade the yard. I let the apples  simmer until they were soft,   So far, so good.  

    When the apples were soft, I ran the mixture though the food mill to get rid of most of the solids and came up with a kind of slurry in a bowl.  Then I started straining that through cheese cloth and the jelly strainer.  I must have done that three times or so.  I was in ecstasy.  The resulting liquid was almost perfectly clear.  This was going to be great!

                                                                             Apple slurry in the bowl

    Except that it wasn't.  Well, not exactly anyway. I boiled that juice and boiled it and tested it and tested it again for jelling.  Nothing.  Well fine then, I thought, I'll just go downstairs and get that fruit pectin I bought a few months ago and add that.  In went the pectin.  I tested for jelling again.  It sluggishly crawled down a cold plate.  Based on the recipe on the pectin bag, I had to get the stuff into jars pronto, so I ladled the soupy stuff in, capped them, and processed them in a boiling water bath for 10 minutes.

    I'm quite an optimist when it comes to jams.  I hope for jam and must sometimes be satisfied with fruit syrup.   This time I was sure that the jelly would firm up and be spectacular.  It would just take a few hours, maybe overnight.  The recipe told me so.  Somebody lied.  

    There are things that cookbooks of the period don't tell you because any woman would have known about them.  I knew that fruit pectin came from apples, so I thought I had that part down.  I didn't.  I have since discovered that pectin is found in sufficient amounts to make jelly in underripe fruit and green apples.  What I had in the box were Red Delicious and Gala apples, and in addition to being rather insipid, they were anything but underripe and certainly not green.  Adding the additional pectin created an apple-flavored, slippery goop that was pretty to look at but wasn't even syrup.  It was something in between jelly and syrup that had apparently crawled out of the jam pot and into my jars.

    I didn't cry, but I was ready to bin the whole lot -  all 26 jars - until I gave Harvest a taste.  "Hmmm," she said,  "Not bad at all."  I didn't know whether to be pleased or horrified.  
    
    "Honestly," she said, "I think it will be great to sweeten my tea."  

    I thought she was mad, but I left a jar in the refrigerator, and three days later, it was gone.  My jelly disaster had become a tea sweetener.  It was far better than chucking it in the bin.  Of course, I'll never be able to create it again, nor would I want to, actually.

    Not to be deterred from my apple jelly experiment, I'm going to give it another go this fall with real apples from one of the local orchards  Apples with real flavor and, with luck, bucket loads of pectin.  The worst thing that can happen is another batch of apple syrup-ish stuff.  If that happens, I'm going to hang up my jelly bag and go back to jams.

    Canning for July was not an entire failure, though.  A couple of years back I discovered rat-tailed radish pickles at a local outdoor market.  Rat-tailed radishes are one of the untidiest plants I've ever had in my garden.  Unlike other radishes which are grown for their roots and are compact and well-behaved, rat-tailed radishes are grown for their pods.  The pods look a lot like little string beans, and they grow on a plant that looks like it's having a bad hair day.  A really bad hair day.  We planted them out in the front garden - the one people walk by - and I could only hope they didn't notice too much.    Thank the gods the plants were at the back.  It was just sort of greenish confusion back there to the viewer, I suppose.  The roses were ever so much more interesting to look at.  Nothing to see here.

    
                          Tangled rat-tailed radishes with their pods

    The Victorians probably didn't have rat-tailed radishes, but they did love their pickles, both sweet and savory, to look at the number of recipes for pickles in cookbooks of the period.  I have no doubt that these little gems would have been a smash hit with them.  Tart and savory, they are a perfect accompaniment for a hearty bread, meat, and cheese plate with olives and other pickled foods.   Like garlic scapes, which were largely ignored until the foodie set found out about them, these little darlings are sure to wind up on a Food Network show soon, and the seeds will then be impossible to get, so get 'em while you can.

    There are two varieties, one green and one purple, and I've discovered that the purple ones stay tender longer and don't go woody as quickly as the green ones which means a longer harvesting period.  Like purple beans, they turn green when they're in their jars in the boiling water bath.  When you harvest them, they should snap like fresh beans if they're just right.  There's some wiggle room with the slightly woody ones - they'll soften up in the pickling - but the really woody ones will be fibrous and hard to chew, so discard those.  The little pods are quite zippy in flavor when raw, but the pickling process mellows them out.  

    The pickles are incredibly easy to make.   If you are new to canning, they're practically bomb-proof.  No need to worry about things like mushy cucumbers.  If you have a local farmer's market, you may be able to purchase some until you can get your own tangled, delicious mess growing in your own garden.

    My own recipe is a variation of one that I found on the You Grow Girl blog.  You can vary the ingredients to suit your taste. This recipe has just a little bit of sugar in it, so if you like a sweeter pickle, add more.  I like to use ancho or pasilla chiles because they add just a little bit of heat and a lot of flavor.  You can find these at your local Mexican food store.

    Because the pods shrink during the hot water bath process, you need to pack them in as tightly as possible.  I try to stuff them into the jars like pudgy toothpicks.

This recipe makes three 1/2 pint jars.

 Ingredients:

About 1/2 pound radish seed pods (you may need more or less, depending on the size of the pods)
1 cup apple cider vinegar
1/2 cup filtered water
1 tablespoon pickling salt
1 tablespoon granulated sugar
1 dried ancho or pasilla chile, cut into small strips
Seasonings listed below

To each 1/2 pint jar add:

1 small clove garlic (I used about 1/2 teaspoon garlic scapes instead)
10 black peppercorns
1/8 teaspoon yellow mustard seed
1 bay leaf (break it into a few pieces if you're using smaller jars)
2 strips of the chile above

Choose tender, crisp, radish seed pods and pluck them individually from the plant. Avoid spongy, mature pods that have turned brownish and have full-sized seeds inside. They tend to be too difficult to chew. (Save them for replanting!) Wash and dry if necessary.

Wash three 1/2 pint jars in hot water.   Place garlic, black peppercorns, and mustard seed, bay leaf and chile strips in each hot jar and then tightly pack in the radish seed pods.

While you are packing the jars, bring the vinegar, water, salt, and sugar to a boil in a nonreactive pot. Stir to dissolve the salt and sugar.

Pour the hot brine over the radish seed pods, leaving 1/2″ headspace.  Check for air bubbles, wipe the rims clean, and seal. Process in a hot water bath for 10 minutes (adjust for elevation).

                                                              Rat-tailed radish pickles - delicious!

       And lest anyone think I may have forgotten July 4th, I thought I might offer a perspective on the freedom, or lack thereof, of American women of the Victorian age.  We tend to take for granted our power to vote.  That wasn't so for the women of the Victorian era.  Women were thought to be incapable of voting because it was said that women’s brains were inferior to men’s, so women were incapable of participating in politics, and if allowed the vote, they would neglect their homes and families causing society to unravel.   

    In 1848, the Seneca Falls Convention, the first women's rights convention, passed a resolution in favor of women's suffrage despite opposition from some of its organizers, who believed the idea was too extreme.  It would take seventy years before women got the vote.  That kind of courage and persistence is a rare thing these days.

.

    In organizing protests and marches demanding the vote, many women were arrested, and some were beaten and sent to prison.  Over 200 National Women's Party supporters, the Silent Sentinels, were arrested in 1917 while picketing the White House.  Some of them went on hunger strike and endured forced feeding after being sent to prison. 

    After a hard-fought series of votes in the U.S. Congress and in state legislatures, the Nineteenth Amendment became part of the U.S. Constitution on August 18, 1920.  It states, "The right of citizens of the United States to vote shall not be denied or abridged by the United States or by any State on account of sex."  My love and respect go out to those hundreds of women who fought for my right to vote.  


                                                                Happy 4th of July, everyone!


Monday, July 18, 2022


June - At Home on the Range 

The stove is a model 8-20D  Riverside, blue porcelain, manufactured by Rock Island Stove Company,  Rock Island,  Illinois. It features a hot water reservoir on the right and a warming oven on the top. 


    Back in April of this year, my friend Scott Johnson of the Low Technology Institute taught a workshop on refurbishing old tools at Schumacher Farm Park.  While he was there, someone affiliated with the park inquired whether he knew of anyone who knew how to cook on a wood cookstove.  Scott mentioned me.  I called them, and after tossing around a few ideas here and there, we had two workshops set up, one in June and one in October.  


    Schumacher Farm Park is a small historical museum in Waunakee, Wisconsin, just north of Madison. The farm sits on a small rise overlooking the fields below it.   It was the childhood home of Marcella Schumacher.  Marcella's father, Henry Schumacher, built the house for his new bride in 1906 for only $5,000. As an adult, Marcella left the area for some years but then returned and  lived in her family home until her death at the age of 83.   She created the Friends of Schumacher Farm to preserve the house and farm as an historic site after her death.      
                                                                                     
    The house has been restored to how it would have looked about 1920, with four bedrooms, a large parlor and dining room.


The dining room sits eight comfortably.                                                                 The beautiful parlor stove would have burned coal.

    The house also boasts a nice-sized kitchen complete with the wood cookstove shown above, a sink with working taps (both hot and cold, what luxury!),  a dry sink, a Hoosier cabinet, and the latest gadget: an electric refrigerator. Based on the design alone, I imagine this  last probably didn't arrive until 1930 or so.


The dry sink, a Victorian leftover but still useful                      The refrigerator was a huge step up from the Victorian icebox.

    The weather had vacillated wildly between cool and blazing hot in the weeks just before the workshop.  There was a nice flow-through of air from the front door to the kitchen and out the back windows of the house, but slaving over a hot stove on a stifling June day is only for the seasoned, dedicated, and desperate.  I love cooking on a wood cookstove, but the very idea of cooking during July and August makes me feel faint.  Still, women did it every day, freezing cold or blazing hot outside, up to three times a day, though most of the heavy cooking and baking in the summer was done in the morning before the heat of the day, and dinner and supper would be lighter foods eaten at room temperature or cooled in the icebox or the refrigerator once that newfangled appliance arrived on the scene.  Those women were of much stronger stock than I am.  My own stove, Milly, hasn't been fired up since it got up to 80 degrees consistently.  I hoped for moderate summer weather for the workshop.  If it wasn't, we'd cook more than just food.

    I wanted to test the stove before the day of the workshop, so I tootled out to the farm the weekend prior.  Good thing I did, too.  Each wood cookstove works differently, and the drafts and dampers on this one worked completely differently than my own cookstove at home: this one was built in 1920 in Illinois, and mine was built in 2018 in Italy.  I had brought Woodstove Cookery: At Home on the Range by Jane Cooper with me, for which I was immediately grateful.  This book is for people who want to install a wood cookstove, usually antique, in a modern home and includes everything you need to know about antique stoves.  Without it I would have been flummoxed.   

    This stove had burned both wood and coal, which would have been handy, but the firebox, the place where you put the wood in the stove, was only a third the size of the one in Milly.  This meant that the size of wood had to be pretty small - that's a lot of chopping - and wood had to be added frequently to keep the fire burning.  Coal would have been far preferable.  In addition, there was a sizable crack in the wall of the stove.  This didn't affect the stove when the park demonstrators wanted to burn a fire for show, but it did affect how the oven worked.  

    And there were three things the people at the farm hadn't thought of: matches (I had brought my own, just in case), kindling, and some paper to put under the kindling to light the fire.  When a kitchen like this is just set up for visitors to look at, rather than to function, things like this tend to get overlooked.  It had rained the night before, and I scoured under the trees for something that wasn't waterlogged to start the fire with.  I didn't come up with much - a few sorry branches that weren't quite as soaked as the rest was all I got for my trouble.  As for the paper, I tore sheets out of my notebook, one after another, until I could get the fire lit.  After that, it was relatively smooth sailing, and I made a dandy batch of biscuits from the 1908 Rumford Complete Cookbook (the recipe is below) which I shared with Rebecca Ressl, the volunteer who was coordinating the workshop, her son, and a couple of visitors.  I also wrote down a note to bring more matches, newspaper, and kindling.

    Equipping a museum kitchen into a functional one was an experience that required a long list, several large tubs, and about every 1920's-ish and earlier piece of cookware I could manage to stuff into them.  This sample will give you an idea: a sifter, rolling pin, measuring cups, enamel pans and enamel bowls of various sizes (every one I had), a hand egg beater, knives, cutting boards, cooking spoons, cast iron pans, soup pot, bundt cake pan, cooling rack, an oven thermometer (a critical piece of kit) and more.  I also brought all the ingredients for a meal of soup (Ukranian green borscht), biscuits, and coffee cake.  I even brought along a teapot and tea so we could have some tea while waiting for the coffee cake to bake.   

    Never let it be said that I'm not thorough.  Every plastic or modern item was squirreled away out of sight, so when the students arrived, they walked into a 1920's kitchen.  I had learned how to cook on a Victorian wood cookstove at a workshop held in one of the restored buildings at Old World Wisconsin, a much larger living history site, and I hadn't appreciated until the day of my own workshop the effort my teachers had put into turning the kitchen there into a working Victorian kitchen.  

    I must take a brief detour here.  Readers of this blog will know by now that I wear Victorian-style clothing much of the time.  Since Schumacher Farm has been restored to 1920, I had to update a piece of my wardrobe by about 30 years.  The 1920's are much more than flappers and women in long fur coats dangling cigarette holders that look like they're about two feet long.  There were plain old farm women, too, but compared to chic city women, photos of these average women were few and far between.


    I managed to find something approximating the period without having to have it made, and I found a reasonably accurate apron as well.  Rebecca Ressl dressed in period style as well, though her outfit was far more stylish than mine.  I've dressed in a lot of period clothing, but I think the 1920's has to be the height of dumpy fashion.  Unless a woman is tall and thin, everything looks like a potato sack.  Still, needs must. 

    The students arrived, and off we went.  There were six students: four adults and two children aged 12 and 14.  Counting Rebecca, there were eight of us in a kitchen that would have comfortably held three or four, and we spilled over into the dining room at some point.  

    I've never wrangled seven people in a kitchen before, and I began to feel a little bit like one of those cooking show chefs: "Chop this fine.  That's great."  "Beat the eggs a little more.  Excellent."  "We need more wood here."  "Where's the spinach?"  "Are the potatoes cooked yet?"  "What's the oven temperature?"  "Here, try this. You can do it." This last one was for one of the kids who had never lit a match before.  He was baffled.  It took him a few tries, but he managed it in the end, and now he has a skill he didn't have before.  Manual egg beaters also seemed to be something of a mystery.  
        As I mentioned earlier, that crack in the side of the woodstove affected the way the oven was going to work.  I had made a great batch of biscuits the week before, and I had tried the coffee cake in Milly, my own wood cookstove, with success, so I placed the coffee cake in the same part of the oven as in my own stove.  The sugar in the batter crystalized too quickly, leaving the outside of the cake overdone before the inside was completely baked.  The coffee cake was the only flop in the meal, but everybody loved it just the same.  It wasn't exactly burned, but it was much, much darker brown than it should have been.  Still,  it wasn't half bad, and it looks glorious in the photo.  

    And after we had chopped and beaten and stirred and sifted and kneaded and simmered and baked and fed the fire over and over, we sat down in the dining room to a real family meal served on china that was as close to 1920's style as we could make it.  It's moments like this that make living history come alive.  We sat around the big dining table, and everyone had something interesting to say.  We talked about where the children wanted to go to school and the pros and cons of electric cars (newfangled cars are eternal, be it horse and buggy or auto-mo-bile), and chickens and small farming and conscious living.  I felt like I'd been living in this house rather than just working in it for a day.

                                                       Lunch served family style in the dining room


        I will leave you with two recipes from the day.  The Rumford Complete Cookbook is fast becoming my "go to" cookbook for the late 19th and early 20th century in addition to the Fanny Farmer Cookbook 1896 Edition.   The biscuit recipe is from the Rumford Complete Cookbook, and it is, by far, the best biscuit recipe I've ever made.  The biscuits are light and fluffy, and they serve up beautifully hot out of the oven or warmed up the following day.  I even like them cold.  The coffee cake recipe is from the Richards House where we spent a weekend in April (see the April 2022 post "The Great Escape for that adventure).  

    I also learned an important lesson in baking: there really is a reason to sift flour.  It makes all the difference in how light the finished baked goods will be.   If you don't have a sifter, go get one.  You won't be sorry.  You can have my sifter when you can pry it from my cold, dead hands.


    Rumford Biscuits
(Page 116 of The Rumford Complete Cookbook)

(This recipe can easily be cut in half.  I used half milk and half water for the liquid, Clabber Girl baking powder, and butter, not lard.  I also didn't add in all the liquid at once but started with 1 1/2 cup of liquid and increased it in small amounts until the proper dough consistency was formed.)

                                2 quarts flour                        2 tablespoons butter or lard
                                1 teaspoon salt                     2 rounded teaspoons Rumford Baking Powder
                                            Milk, or milk and water, to mix (about 1 1/2 to 2 cups)

        Sit well together the flour, salt, and baking powder.  Rub in the fat as lightly as possible with the fingers, just working it until the fat is well blended with the flour.  Then mix to a very soft dough with the milk or milk and water, leaving this always as cold as possible.  Mix with a flexible knife (I used a dough blender/pastry cutter) in preference to either a spoon or the hand as the steel blade of the knife is colder than the spoon and also because it cuts and mixes the dough more thoroughly.  Turn the dough onto a well-floured board, and roll or pat it with the hand until about three-quarters of an inch thick.  Cut into biscuits and lay them, not touching each other, on a baking pan.  Bake in a quick oven (about 375 - 400 degrees on modern ovens) for twelve to fourteen minutes.
        The requirements for good biscuit are: 1.  A very soft dough, so soft as to be almost sticky; 2. Very little handling because  much manipulation destroys their lightness; 3.  A very quick oven.  If biscuits are not allowed to touch each other in the pan, they will be lighter and more delicate than when placed close together.

Sour Cream Cinnamon Swirl Cake

(recipe from The Richards House, Dubuque Iowa)


Note: The original recipe calls for 1 box Betty Crocker yellow cake mix.   This wasn't available in 1920, and it's got an alarming number of non-food ingredients.  I have substituted a recipe for a homemake yellow cake mix instead (see below) which is simple, tasty, and keeps well.  The directions indicate that the coffee cake should be baked in a bundt pan, which we have, but I'm not sure that's absolutely necessary, though the baking time may vary.


1 batch of homemade yellow cake mix (see recipe below)

4 eggs

1/2 cup sugar

1/2 cup brown  sugar

3/4 cup oil

1 cup sour cream

3/4 cup chopped nuts (optional - slivered almonds are divine)

1 Tbsp. cinnamon

1 tsp. vanilla (needed for homemade cake mix above)


Mix brown sugar and cinnamon in a bowl and set aside.  Generously grease a bundt pan and set it aside.

Mix together the homemade cake mix ingredients in a large bowl, adding nuts if desired.  

Beat eggs until thick and fluffy.  Add white sugar, vanilla, and oil and beat again.  Add sour cream and stir to mix well. 

Pour half the batter into a bundt pan, then sprinkle with brown sugar.  Mix in with a knife blade to form a swirl.  Pour remaining batter on top.  Bake at 350 degrees (a moderate oven) for about an hour.


Homemade Yellow Cake Mix (makes the equivalent of 1 box of Betty Crocker yellow cake mix)


2 cups all purpose flour

1 cup sugar

1 Tbsp. baking powder

1/2 cup non-fat powdered milk


Combine these ingredients and store in an airtight container.  It will keep well in the pantry for months.  When you use it, you will need to add 1 tsp of vanilla to the recipe as the recipe will assume that vanilla was included in the store-bought mix.


August - Peaches, Tomatoes, and Flax - Oh, my!     August this year seemed like a month suspended in time followed by an insane rush.  After...